Environment
Situation
Resolution
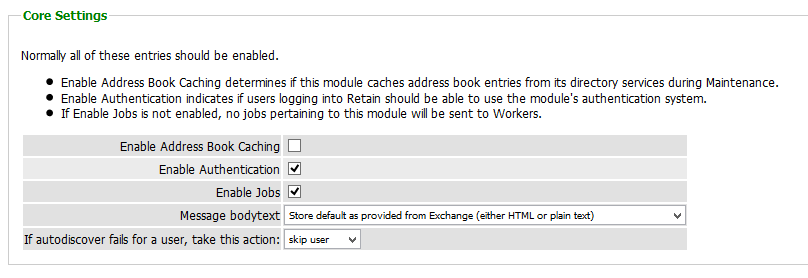
Important: You can only user mailbox mapping BEFORE you refresh the address book the first time to the new email system. When you set up the module, disable "Enable Address Book Caching" until you are ready.
You must first understand that Retain stores user data by the user's GUID (Global Unique IDentifier) so that each mailbox is unique. If you have two users with the same name, they will not be confused. For any email system, the user's email address obviously needs to be unique so people are not receiving each others' mail.
Retain uses mailbox mapping to allow admins to join the two mailboxes together. This allows users to switch between the two mailboxes through a drop down menu rather then logging out and logging back into Retain with the other system's credentials.
Steps
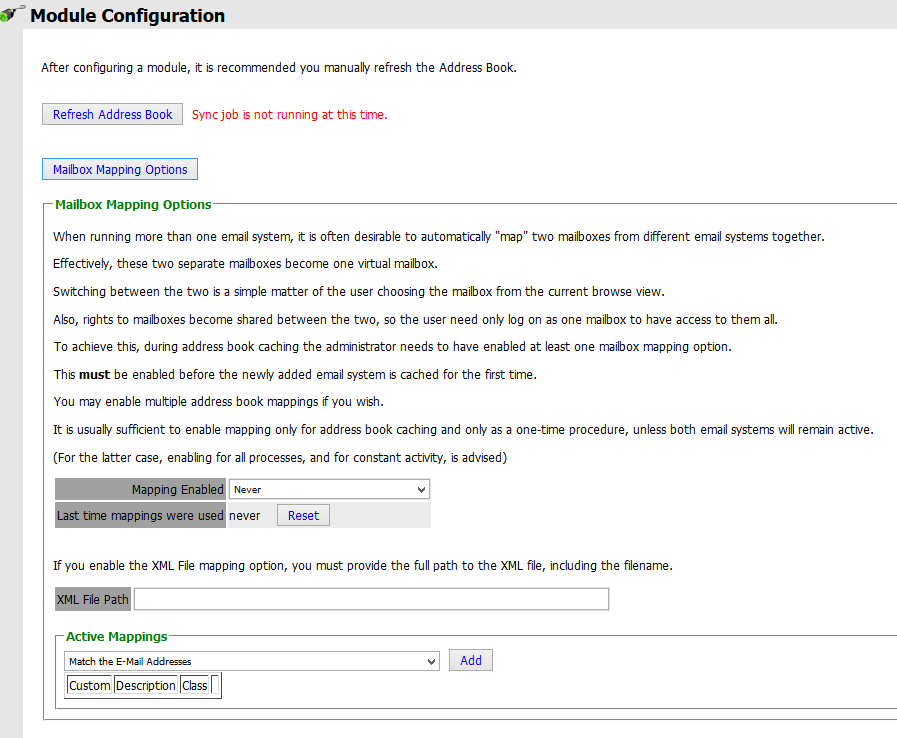
1. In Module Configuration click on the Mailbox Mapping Options to open the tool:
2. The first thing to do is to choose how you want to enable mapping.
Under the Mapping Enable drop down menu you have to choose between "Once, Address Book Cache only" or "Always, all processes".
- "Once, Address Book Cache only" is for when you are migrating from one email system to another
- "Always, all processes" is for when you have two email system running concurrently
3. Next, select what values you want to map.
There are four options under Active Mappings:
- Match the E-Mail Addresses
- Match the Display Names
- Use an administrator-supplied XML file to bind the two accounts
- Match the first and last name
Matching the email addresses is often the easiest option as most organizations keep the same email address for their employees.
When that is not the case choosing to match by display names or first and last names is available. You must name sure that the names are unique on both systems. On most large systems it is the display name that is unique since first and last names may not always be unique given a large enough staff.
You can always clean up the one-offs that do not make a proper match by using the Merge/Splitter utility and manually mapping them.
We do not recommend using the XML file mapping option. Using this might be as time consuming as manually mapping each user with the Merge/Splitter utility. The "source" and "destination" mailboxes in that file are meant to be internal UUID. You can take them from t_abook, column f_uid, (e.g., 990075ff-8270-4474-b69e-bc23c9b22e62).
4. After choosing an Active Mapping, click on the Add button.
If you are ready, go to the module and re-enable "Enable Address Book Caching", return to the module configuration page and press "Refresh Address Book". That's all you need to do.
See Also:
How Mailbox Mapping Looks To Users
How to Use Mailbox Merger/Splitter tool


