Environment
Situation
Resolution
1) First, decide how the overall layout set up works best for the company, such as having it all on one server, or more than one server. Is there going to be a separate postgres server, have a designated SMG server be the postges server, or have each server host their own db's.2) Deploy the first SMG server. Link to installation section in manual.3) If installing more than one SMG server or if postgres will be on a designated server, then remote connections will need to be allowed. Follow the instructions HERE for doing that.If only using one SMG server, continue to step 4. If there will be more than one SMG server, do the following:a) The first server should have already been deployed. Go through the Post-Installation Configuration as found in the manual HERE. On step 3 for Configure Server:1) Make sure to keep 'Setup default system' checked.2) Postgres Database Configuration. Make sure in the DB server address field for CONFIG, QUARANTINE, STATISTICS, and TRACKER that the IP of the server that the postgres db will reside is entered (do not use the loopback address). If the postgres DB will reside on this first server, then put the IP of this server. If it's going to be on a designated server, then put in the IP of that server.b) Install each additional SMG server.
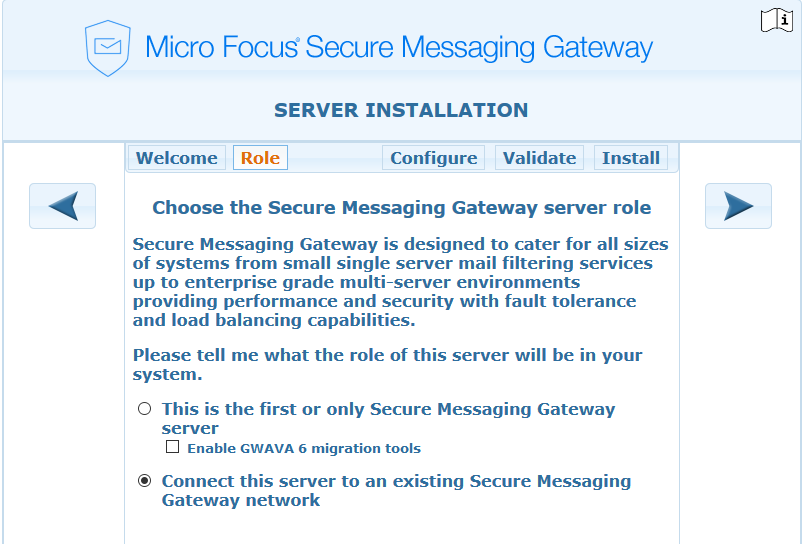
Proceed with the wizard.1) This time select "Connect this server to an existing Secure Messaging Gateway network"
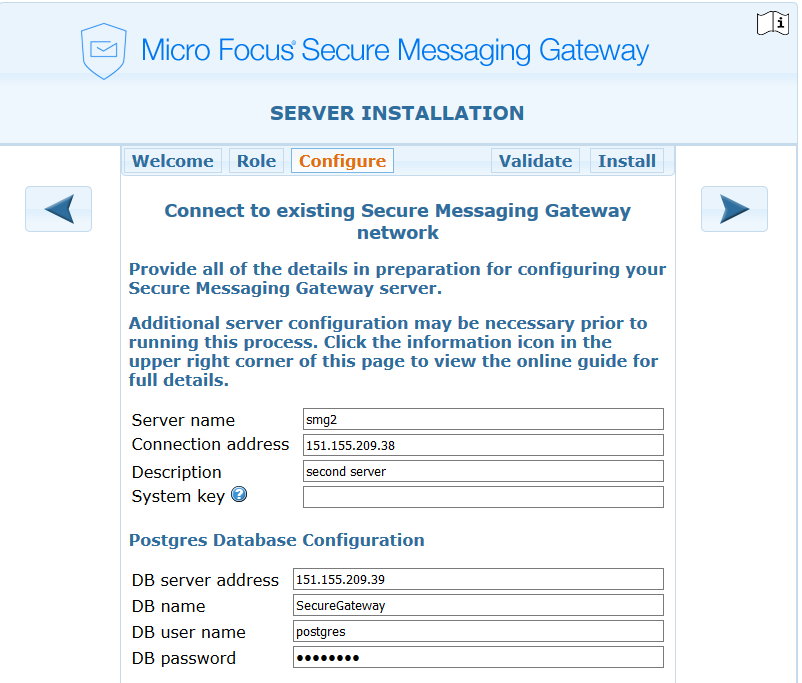
2) Configure next Secure Messaging Gateway server.Server name: The name this server will use.
Connection address: The IP address of this server.
Description: An optional field to describe this server.
System key: (Optional) The system key is a unique value used to secure your Secure Messaging Gateway system, that is shared across all servers. Due to its sensitive nature, it is not stored in the system database.
Typically, leave this entry blank, and an existing gwavaman program will be contacted to acquire the key during the validation step.
If the validation process cannot obtain this key from another server, you will need to access the config/system.xml file inside the Secure Messaging Gateway directory on an existing server and enter the <privatekey> entry here manually.
Please note that entering an invalid key will cause secure data to be incompatible between servers and will very likely lead to system instability.
DB server address: The address of the database server, the first Secure Messaging Gateway server or other designated postgres server.
DB name: The name of the database (default is SecureGateway).
DB user name: The username for the database (default is postgres).
DB password: The password for the database (default is postgres).
3) Click on the next arrow to validate and install the server.
C) Repeat these steps for each additional SMG server.
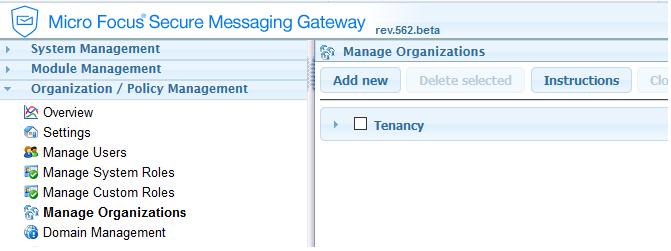
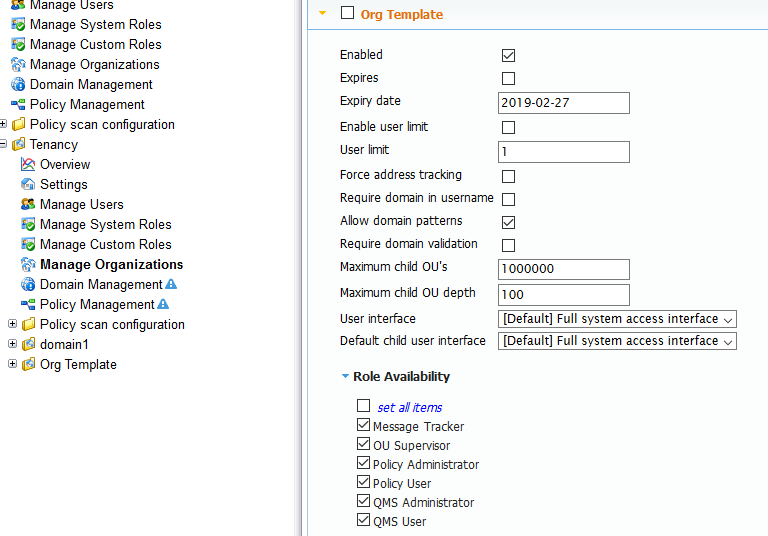
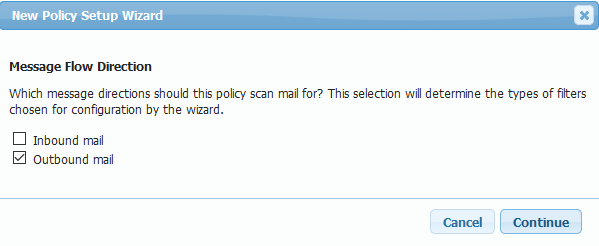
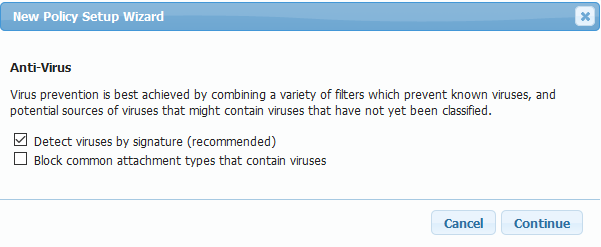
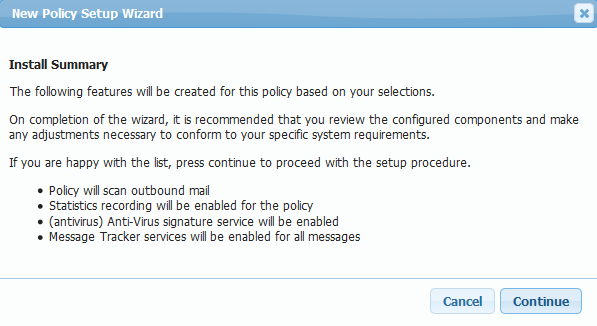
4) Under Organization / Policy Management | Manage Organizations | click Add new and name it something like Tenancy. This will be the default OU. Save changes and hit the refresh icon on the top right.5) Open the new Tenancy OU and User interface Availability. Check 'set all items'. Repeat this for Template, Exception, Service, Event, and Role. Under Role Availability uncheck 'System Administrator'. Save and hit the refresh Icon.6) There should now be a Tenancy folder in the menu on the right, open it and create a new org in it. Click on Manage Organizations | Add new, name it something like Org template. This will be the template for additional Orgs.7) Do the same thing with the Tenancy org and check 'set all items' under each Availability item. Save changes and hit the refresh Icon.8) There should now be a Org Template in the menu on the right as well. Open Org Template (or whatever it was named) and click on Settings. The Message Tracking data retention days can be changed here if desired. The default is 30 days.9) While under the Org Template still, click on Policy Management.a) Create an Inbound Mail Filter Policy for SMTP mail traffic using the wizard. This can be tarted by clicking on 'add new with wizard'. Go through the wizard choosing SMTP mail traffic, Inbound mail (uncheck outbound mail), leave the defaults for the rest of the settings. Link to Policy Management in manual if there are questions. Save changes.b) Create an Outbound Mail Filter Policy for SMTP mail traffic using the wizard. Start it the same way as above, choosing SMTP mail traffic, Outbound Mail (uncheck inbound mail), uncheck everything that is not desired to be scanned for outbound. Most customers only do virus scanning. Below are screenshots of what most do for outbound scanning, feel free to make adjustments that fit your company best.
Uncheck common attachment types, so that users can send attachments outbound.
Uncheck quarantine, since it's better to just block virus'.
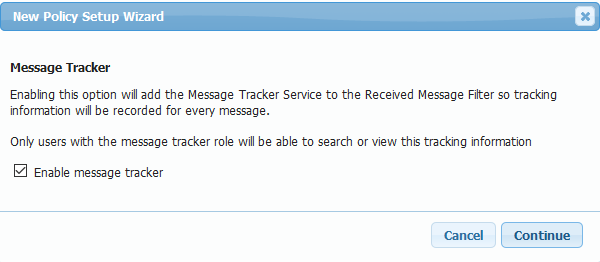
Leave Message tracker checked to be able to see outbound email in Message tracker.
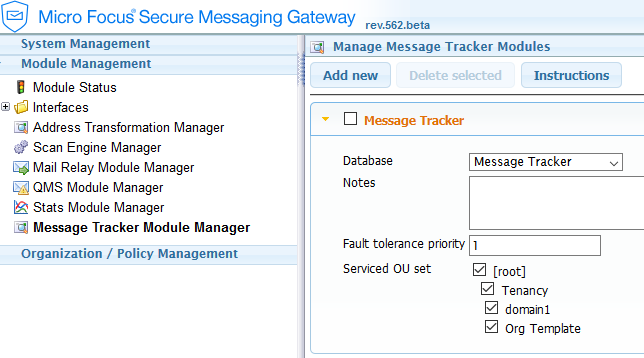
After finishing, save changes and hit the refresh Icon. It should now show up in the menu on the left under Policy scan configuration. Configure it from here. Even though spam wasn't selected on the outbound scanner, it still gets added, this will need to be deleted. To do that click on the Outbound Mail filter policy under Policy scan configuration, click on 'spam filter group', hold cntrl down while clicking on 'Quarantine', "Quarantine White List', 'Anti-spam', 'RBL', and 'SURBL' then hit the delete button. This should remove them all at once, or click on the garbage can for each one. Feel free to configure it as desired. Save changes.10) Under Module Management | Message Tracker Module Manager | Message Tracker | Serviced OU set, check all the boxes (root, tenancy, Org template). Save changes and do the same for Stats Module Manager, QMS Module Manager, and Scan Engine Manager.11) Go under SMTP Interface Manager | smtp interface, under Serviced OU set check all the boxes here as well.They should now be linked. This can be verified by looking under Org template | SettingsMulti-Tenant Post Install Tasks1) Add new Relay Module:a) Under Module Management | Mail Relay Module Manager - Click Add New and give it a name such as smg2 relay. Save and hit the refresh icon.b) Open the new module and set the Host Server to the correct serverc) Set Maximum SMTP threads to 32, or the desired amount.d) For Delivery Targets, check the box next to 'Defined domains'e) Under SMTP Relay Target List, add the hostname or IP of the email server that mail should be relayed to. Set Auth to auto. Add an auth username and password if the email server requires it. Set security to auto.Save changes.2) Add new Scan Engine:a) Go to Module Management | Scan Engine Manager | Click on 'Add new' and name it something like smg2 scan engine.Save changes and hit the refresh Icon.b) Open the new scan engine and set the Host server to smg2 (or whatever the second server was named)c) Check the box next to 'Enable REST Service'd) Set Connection address to itself (smg2 server) Use it's IP address, not the loopback IP of 127.0.0.1.e) Check all the boxes in 'Serviced OU set'f) Rename the existing Scan Engine to something like smg1 scan engine3) Clone SMTP Interface:a) Go to Module Management | Interfaces | SMTP Interface Manager | Rename the existing SMTP Interface to something like smg1 interfaceb) Open smg1 interface | Scanner Fault Tolerance | Priority Influence | Set smg1 scan engine to 1 and set smg2 scan engine to 10. Save changes and hit the refresh Icon.c) The next step will be to clone the smg1 interface, feel free to make any other setting changes needed, so they are included in each new interface, such as SSL settings.For SSL the SSL certs will need to be installed on each server. Here are links to SSL documentation:d) Check the box next to smg1 interface and then click on Clone selected.e) Name the new one smg2 interface Save changes and click on the refresh Icon.f) Open new smg2 interface, Set Host server to smg2g) In smg2 interface | Scanner Fault Tolerance | Priority Influence | Set smg2 scan engine to 1 and set smg1 scan engine to 10. Save changes and hit the refresh Icon.h) Make sure under 'Serviced OU set' they are all checked.Now under Org template | settings, attached interfaces and attached scan engines should show up.The system is now ready to set up multiple tenants. Here's how to set them up manually:1) Organization/Policy Management | Tenancy | Manage Organizations | Check the box next to Org Template and click on 'clone selected. Save changes and hit the refresh Icon.2) Name the new Org, such as the email domain. For this example it will be called domain1.3) Open domain1, verify that it has the changes made on the Org template above.4) The new org should now show up in the menu on the left.5) Users can now be added in the domain. Under domain1 | Manage Users click on 'Add new' and give it a name such as domain1admin. Give it full rights. Add other users as needed. The nice thing here is specific rights can be assigned to users. A user can be assigned rights to be a Policy Admin, QMS Admin and/or OU Supervisor. End users will show up as soon as they login.6) Under domain1 | Domain Management - click Add new and name the domain, such as domain1.com. Save changes and hit the refresh Icon.a) Open the domain, make sure Enable User Auto-Provisioning is checked.b) Set the SMTP Target host for this domains email server.c) Set Security and Authentication to Autod) It's recommended to change the Line Limit to 8000The connection can be tested by using the Test button.7) Additional servers can now be added in the same way. The postgres server should already be set to allow all of the additional servers access, assuming the IP range was added to include them all.8) Look under Module Management | Module Status each server in the list should show up here. They should each have their own gwava, gwavaman, gwvrelay, and gwvsmtp modules. Only one server can host the QMS.