Environment
Situation
This technical note provides detailed steps to migrate Verastream Host Integrator (VHI) from version 7.0 or higher to version 7.1 or higher in a Windows environment.
For Verastream Host Integrator version information, see KB 7021353.
Note: If you are upgrading from version 6.6 or earlier, see KB 7021552.
Resolution
64-Bit vs. 32-Bit
Beginning with version 7.5, your Windows system must be 64-bit. If you still need support for 32-bit Windows, please install version 7.1 SP2 (7.1.2026) in your environment. For more information about supported platforms, see also KB 7021532.
When you upgrade an existing 32-bit installation (version 7.0 through 7.1.x) to 64-bit (version 7.5), the 64-bit files are installed to the existing folder in C:\Program Files (x86)\Attachmate rather than the non-x86 folder normally used for new 64-bit installations.
Upgrade Steps
Follow the steps below to upgrade Verastream Host Integrator (Development Kit or Server Kit) from version 7.x to version 7.1.x or 7.5 on a Windows system.
- If you have a multi-server installation environment (for load distribution and failover), stop services on all systems.
- Open a Command Window as administrator.
- At the DOS command prompt, enter the following commands:
cd %VHI_ROOT%\bin\servicesstopall.bat- Repeat the above steps on all systems in the installation environment. Failure to do so may cause corrupted management server data.
- In your existing installation, if certain configuration files were manually edited, the custom changes will need to be manually migrated. Examine the date/time stamp of the following files and, if any file is newer than other installed files, make a backup copy (outside the installation folder, to be used later in step 8):
- (Version 7.0 through 7.1.221) Web service SOAP stack configuration: service-ctx.xml file in the C:\Program Files (x86)\Attachmate\Verastream\HostIntegrator\sesssrvr\services\ws\META-INF folder
- JVM configuration files in the C:\Program Files (x86)\Attachmate\Verastream\HostIntegrator\etc folder (version 7.1.221 or higher):
- destool.conf (Design Tool and deployment tools)
- logmgr.conf (Log Manager for session server)
- webbuilder.conf (Web Builder application)
- webserver.conf (Web Server for Web Builder-generated Java web applications)
- vhi.conf (default Java location for the above components)
- Management server JVM configuration: container.conf file in the C:\Program Files (x86)\Attachmate\Verastream\ManagementServer\conf folder.
- Host Emulator JVM configuration: container.conf file in the C:\Program Files (x86)\Attachmate\Verastream\HostIntegrator\hostemulator\conf folder.
- After downloading the product from https://download.attachmate.com/upgrades, run the downloaded .exe file as an administrative user. You may be presented with a Security Warning dialog box confirming that the file is published by Attachmate.
- Select a folder to unpack installation files. Click the ellipsis button (â...â) to browse to a different folder location. If you unpack to the Desktop, we recommend that you use a subfolder.
- After the unzip process is complete, setup.exe automatically starts. If User Account Control is enabled, you may be prompted to confirm installation.
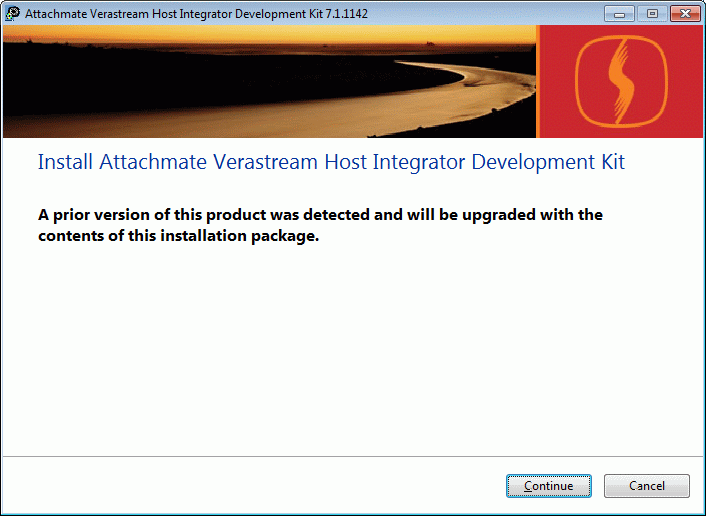
- When the existing 7.x installation is detected, you are prompted with the following dialog box message:
Click Continue and accept the license agreement to proceed.
Note: If you see an installation error "To upgrade to a newer version . . . , you must have the previous Development/Server Kit installed,â see KB 7021583.
- Installation proceeds and preserves existing data including:
- Session server configuration (session pools, model variable lists, etc.)
- Deployed models
- Session server log data
- Authentication and authorization configuration, including management server administrative password (as described in KB 7021567)
- Load balancing domains (as described in KB 7021566)
- Session pool schedules
- Web Builder projects
- After installation completes, restore any custom configuration from step 2 above. Follow the appropriate procedure below, depending on which version you are upgrading to.
Upgrading to Version 7.1.1142 (Service Pack 1) or higher:
Note: Beginning in version 7.1.1142, the service-ctx.xml file is no longer used for customizing your web services configuration.
- If you backed up the service-ctx.xml file in step 2, examine it in a text editor. If you previously set custom values for any of the following properties, re-configure them in the Administrative Console application.
| Description |
Property in Versions 7.0.961 through 7.1.221 |
Original Default |
| WS-Resource and WS-Addressing |
wsResourceEnabled * |
true (commented out) |
| ExecuteSQLStatement web method |
executeSqlStatementEnabled |
true (commented out) |
| processString web method |
processStringEnabled |
true (commented out) |
| Milliseconds to wait for session server to return from table procedure |
methodTimeout ** |
60000 (commented out) |
| Minutes before session server destroys suspended sessions (applicable using WS-Resource stateful web services) |
suspendTimeout * |
60 (commented out) |
**Supported in versions 7.0.982 through 7.1.222 only.
- If you need to set custom values for any of the following, see KB 7021550.
| Description |
Property in Versions 7.0.961 through 7.1.221 |
Original Default |
| HTTP web service port |
hostPort |
9680 |
| HTTPS web service port |
secureHostPort |
9681 |
| Session server load distribution domain |
domainName |
(commented out) |
| Non-local management server for load distribution domain |
serverName |
localhost (commented out) |
| HTTP basic authentication for client user authorization without WS-Security |
authnMetadata and authnService |
false |
- If you backed up any JVM configuration files in step 2, edit the installed default *.conf files to merge in your custom modifications. After saving changes, restart the appropriate service(s) as described in KB 7021352.
Upgrading to Version 7.1.221:
- Using the backed-up version 7.0 service-ctx.xml file from step 2 as a guide, edit your installed version 7.1 file located in C:\Program Files (x86)\Attachmate\Verastream\HostIntegrator\sesssrvr\services\ws\META-INF.
Note: Do not replace the installed 7.1 file with the previous 7.0 file, as there are new settings available in version 7.1. For more information about settings in this file, see KB 7021550.
- After saving changes, restart the session server service as described in KB 7021352.
Web Services
After upgrading to version 7.5 SP1 or higher, you may need to re-import the VHI web services WSDL in your SOAP tool, due to changes in the target namespace (as described in KB 7021323) and changed default for WS-Addressing and WS-Resource (see also KB 7021336).
Host Application Models
This section addresses the use of existing models that were created in previous versions.
Source Model Locations Changed
Beginning in version 7.1, to support Windows User Account Control (UAC) security, Development Kit user data files are stored in personal folders (instead of under \Program Files). Source model file locations are changed as follows:
- By default, Design Tool will save models to a personal folder <Documents>\Attachmate\Verastream\HostIntegrator\models. If you save models to a different folder, that location becomes the new default. The <Documents> folder is platform- and user-dependent, typically C:\Users\<user name>\Documents (on Windows 7) or C:\Documents and Settings\<user name>\My Documents (on Windows XP).
- Sample models are now located in %VHI_ROOT%\examples\ModelSamples. Host Emulator "master" models are moved to %VHI_ROOT%\hostemulator\models. (In version 7.0, these files were all stored in the same %VHI_ROOT%\models folder.)
Keep Unchanged vs. Convert
You can choose from two upgrade approaches for your models:
- You can leave the existing model(s) unchanged. Compatibility settings are automatically enabled (where applicable) to maintain the same behavior as in earlier versions.
Models that were deployed to the session server remain deployed after the installer migration process (typically located within C:\Program Files\Attachmate\Verastream\HostIntegrator\deploy).
-OR-
- You can manually convert models to the new version and re-deploy. Use this approach if you need to make changes to a model, or you want to take advantage of the latest product functionality (such as performance improvements).
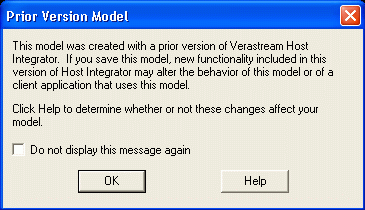
- Open the model in Design Tool. You may see the following dialog box:
- Verify the model continues to behave as you expect. For example, in certain cases it may be necessary to delete a pattern and re-add it. You should also verify that other aspects of the model, such as operations, recordsets, and procedures, behave correctly.
- Save the model. Note: Once you convert a model file to a newer version, it can no longer be loaded by an earlier version of Session Server or Design Tool.
- To take full advantage of the latest product functionality, disable compatibility settings in the model and re-test as appropriate. For more information on compatibility settings, see the "Compatibility Settings for Host Integrator Upgrades" topic in the VHI User Guide. For example, in VHI 7.6, see http://docs2.attachmate.com/verastream/vhi/7.6/en/topic/com.attachmate.vhi.help/html/reference/compatibility_switches.xhtml.
Web Builder Changes
When upgrading your Web Builder projects, be aware of the following changes:
- After upgrading to version 7.5, any existing pre-7.5 Java projects must be re-built. See also KB 7021330.
- By default, in a new installation, Web Builder project files (both .NET and Java) are generated in <Documents>\Attachmate\Verastream\HostIntegrator\projects. This location can be changed in Web Builder (Options > Web Builder Settings > Common). When Web Builder version 7.1 or higher is first run, existing projects are migrated. In version 7.0, projects were typically saved to C:\Program Files (x86)\Attachmate\Verastream\HostIntegrator\projects.
For more information about project files, see http://docs2.attachmate.com/verastream/vhi/7.1/en/topic/com.attachmate.vhi.webbuilder.help/html/reference/wb_folder_files.xhtml.
- Web Builder settings are stored on a per-user basis in %APPDATA%\Attachmate\Verastream\HostIntegrator\webbuilder by default (and can be changed in the Web Builder Settings dialog box). In previous versions, the settings were global for all users.
- In Web Builder, if you need to re-enable the Run button for Java projects, re-deploy the project.
- If you have any user-defined project types created in previous versions, projects based on these types may not display in Web Builder version 7.1 or higher, or fail to build. For more information, see KB 7021580.
Client Applications
We recommend that you install the new connector API files on systems running client applications. While you may be able to continue using the old connector, an "Undefined error message" indicates that a connector upgrade is required. The error message may also include an error number that can provide further information. See the list of error numbers at http://docs2.attachmate.com/verastream/vhi/7.1/en/topic/com.attachmate.vhi.help/html/reference/h_rte.html.
Note: If you have statically linked to any of the connector files in your applications, you must re-link to the connector files after upgrading in order to take advantage of new methods and features.
Administrative Console
In the Administrative Console application, when connecting to a remote management server, ensure that the versions are the same. Otherwise, unpredictable results may occur. Particular care may be required to avoid connecting across environments, such as running Administrative Console from an upgraded Development Kit and connecting to a production server environment that has not yet been upgraded.

