Environment
Identity Manager 4.x
Situation
How do you secure the communications between the Identity Manager (IDM)
engine and a remote loader instance running on a Linux Server?
Resolution
Prerequisite: Verify the Tree CA is valid
7. Leave the default option of Organizational certificate authority checked and click NEXT.

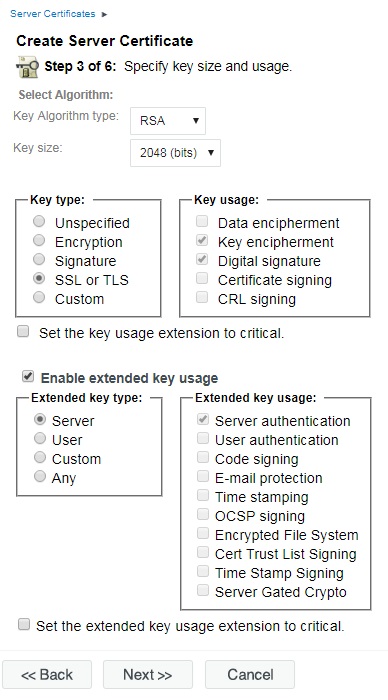
8. Leave all the key size and usage options on the default settings and click NEXT.
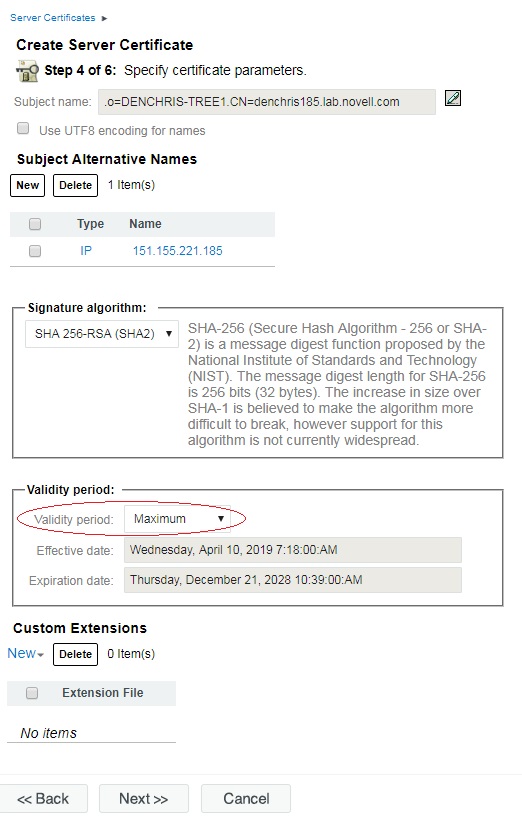
9. On the Specify certificate parameters,
change the Validity period to Maximum. This will set the expiration
date to the expiration date of the Tree Certificate Authority. Then click NEXT.
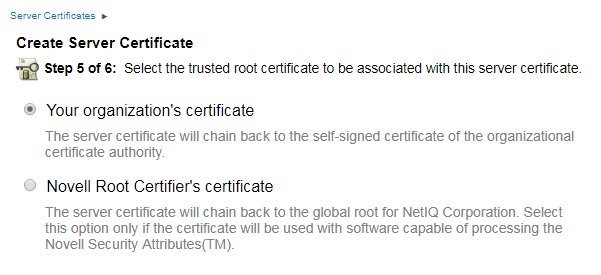
10. Leave Your organizations certificate selected (default) as the trusted root certificate and click NEXT.
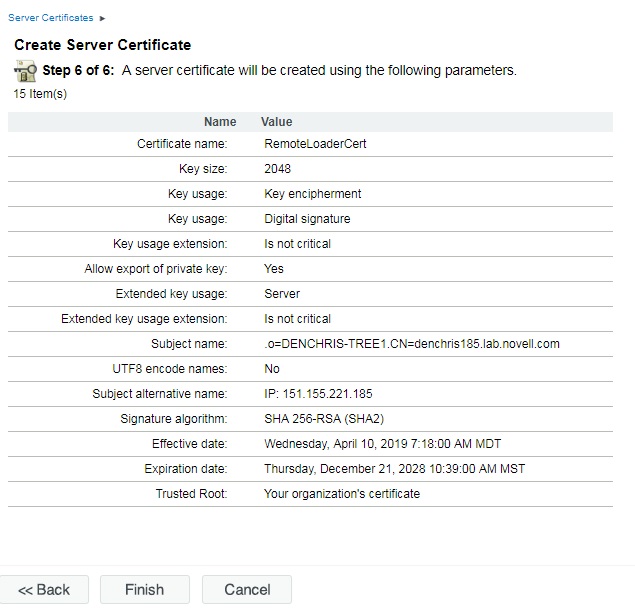
11. You should be at the summary screen, like the one below.
Export the Certificate and copy to Remote Loader Server:
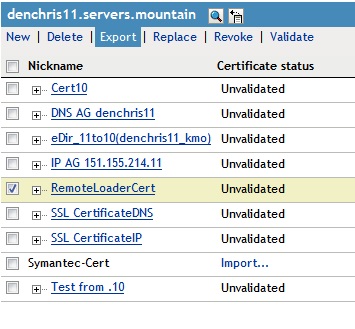
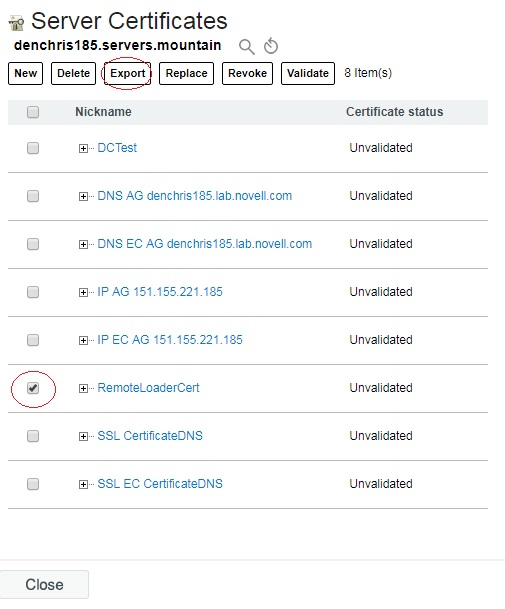
13. In iManager, under the NetIQ Certificate Access role, Server Certificates task, check the certificate you just created (RemoteLoaderCert) and click EXPORT
20. Test your secure remote loader channel and see it is
working by making a change that the driver will pick up and see
if syncs across. Or by viewing the remote loader or driver logs, or viewing the IDM Dashboard. You can turn on tracing
on the remote loader side by adding a -trace 4 and -tracefile/tmp/filename.log in the remote loader configuration file, then restarting the remote loader.
1. With iManager, login to the Identity Vault where your Driver is running.
2. Edit the Properties of the Certificate Authority under your
security container. (Novell Certificate Server Role, Configure
Certificate Authority task)
3. Check the expiration dates of your OU=xxx certificate and Self
Signed certificates by clicking on them. If they are expired or about
to expire will want to recreate your Certificate Authority by deleting
it and recreating it. (by Default the CA is valid for 10 years) Note:
Deleting the CA and recreating it may affect other services using the
tree CA Certificates.
Steps to Create Remote Loader Certificate in eDirectory
4. With iManager, login to the Identity Vault where your Driver is running.
Steps to Create Remote Loader Certificate in eDirectory
5. In iManager, select the Novell Certificate Access role, Server Certificates task. Make
sure your IDM server running the Driver is highlighted and selected
above, showing the certificates associated with that server. If not, browse to the correct server.
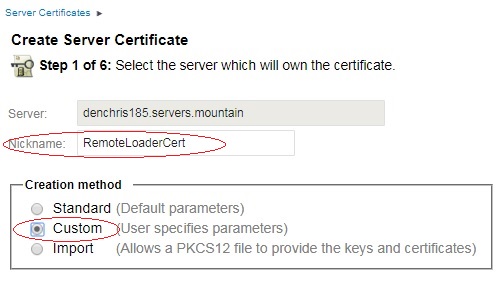
6. Next we are going to create a new server certificate, valid to
the length of the Tree CA certificate. (so you don't have to redo this
every 2 years). Click the new link above the existing certificates.
Then make sure the correct server is specified, and give it a NickName
(name) like RemoteLoaderCert, and select the Custom creation method,
then click NEXT.
7. Leave the default option of Organizational certificate authority checked and click NEXT.
8. Leave all the key size and usage options on the default settings and click NEXT.
11. You should be at the summary screen, like the one below.
Just to review, the only thing that was changed was selecting
Custom Certificate, and setting the Expiration Date to Maximum. All of
the rest of the options were default options.
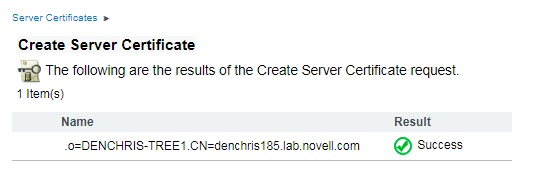
Click FINISH to complete the server certificate creation process. You should receive a Success message like the one below.
Assign the Certificate to the Driver
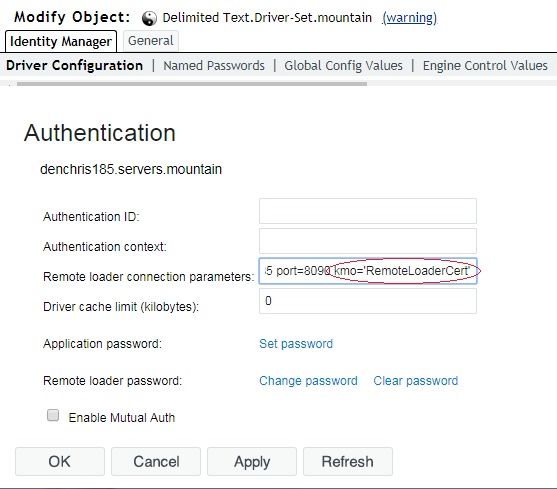
12. Assign the Certificate just created to the Driver.
Edit the properties of the Driver. (Select the Identity Manager
role, Identity Manager Overview, search for your driver set, click on it
and left click the red or geeen status light on the driver and select
edit properties.) Once you are in the properties of the driver, select
Driver Configuration, and scroll down the the Authentication section.
Under the Remote Loader connection parameters, append
kmo='RemoteLoaderCert' to the hostname and port settings. (or the
correct name of your certificate just created in step 7). NOTE: The
kmo parameter is the shortname (without the server name appended to the
back) and MUST be included in single quotes as shown or it will NOT
connect.
Click OK to save the changes, and when prompted to restart your driver, click OK.
Export the Certificate and copy to Remote Loader Server:
13. In iManager, under the NetIQ Certificate Access role, Server Certificates task, check the certificate you just created (RemoteLoaderCert) and click EXPORT
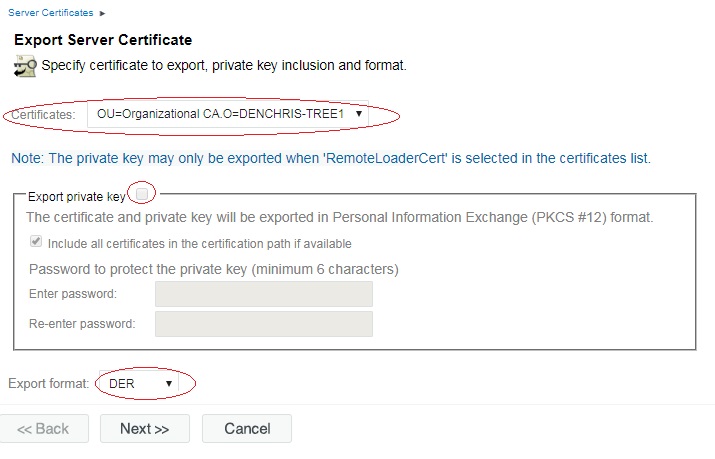
14.
Select the Tree Certificate Authority (NOT the RemoteLoaderCert),
uncheck export private key if it is checked, and leave the export format
to DER and click NEXT.
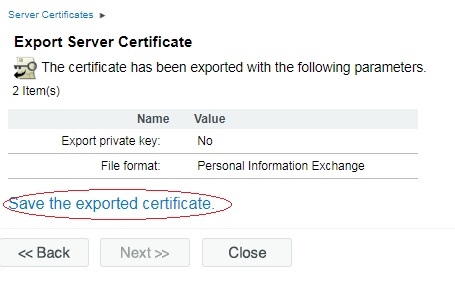
15. Click Save the exported certificate, to save the certificate file.
16. Rename the cert.der file to match your certificate name (RemoteLoaderCert.der), and copy it over to the remote loader server. Place it in the /var/opt/novell/dirxml/rdxml/ directory or similar.
Configure the Remote Loader to use the Certificate:
17. On the Linux Server running the remote loader. Import the RemoteLoaderCert into a keystore file. This can be done with keytool and the following command.
keytool -import -file <filename> -keystore <keystore filename> -storepass <password>
Example:
/jre/bin/keytool -import -file /var/opt/novell/dirxml/rdxml/RemoteLoaderCert.der -keystore /var/opt/novell/dirxml/rdxml/RemoteLoaderCert.keystore -storepass dirxml
When executing the command, you should receive a view of the certificate information and the question: Trust this certificate? [no]: yes
Certificate was added to keystore
18. Configure the Remote Loader configuration file to use the keystore file you just created.
Edit the remote loader configuration file and add keystore=<keystore filename> and storepass=<password> on the connection line.
For example
-connection "port=8090 keystore=/var/opt/novell/dirxml/rdxml/RemoteLoaderCert.keystore storepass=dirxml"
Save the changes to the remote loader configuration file.
19. Restart the remote loader for the change to take affect.
Unload the remote loader
rdxml -config <config filename> -u
For example: /usr/bin/rdxml -config /var/opt/novell/dirxml/rdxml/config8000.txt -u
You will have to enter the remote loader password to unload the remote loader instance.
If you do not know the remote loader password, you can kill the rdxml instance.
Load the remote loader
rdxml -config <config filename>
For example: /usr/bin/rdxml -config /var/opt/novell/dirxml/rdxml/config8000.txt
Additional Note: If you need to set (or reset) the password for the remote loader instance, use the -sp option. It will prompt you for the driver and remote loader password. Then remote the -sp option to load the remote loader normally.
Happy Secure Syncing!!!
Additional Information
Related Technical Information Documents: