Environment
eDirectory 9.1
eDirectory 9.0.4
eDirectory 8.8.8.11
iManager 3.1
iManager 3.0.4
iManager 2.7 SP7
NetIQ Certificate Server
eDirectory 9.0.4
eDirectory 8.8.8.11
iManager 3.1
iManager 3.0.4
iManager 2.7 SP7
NetIQ Certificate Server
Situation
Joining a new server to the tree is taking over two hours.
Validating public keys on certificates returns: Invalid: CRL Decode Error
Routers and Firewalls are strictly filtering out unsecure ports such as port 80 and 8028.
Browsers are complaining about being unable to get the CRL (Certificate Revocation List) using the certificate's CDP (Certificate Distribution Point) URL.
Resolution
The ability to have CRL validation on server certificates is an important feature of Certificate Server. If a server certificate becomes compromised this is the only way to quickly notify clients to no longer use its public key. It is our recommendation for most organizations to utilize this service to gain increased security hardening.
In eDirectory 9, CRLs are added to server certificates by default. They represent a URL (typically http://) from which the client can anonymously pull down the CRL, lookup the certificate's serial number and determine if it has been revoked by the signing RootCA.
Some environments only use their certificates internally and have decided to not implement CRL validation. Others have network policies too restrictive to properly implement the service. This TID has been prepared with these in mind. It provides a tree-wide way to prevent the addition of CDPs to newly minted certificates. In this way clients will no longer be required to perform CRL verification.
Summary of Steps
- Delete the CRL object(s)
- Delete the ndspkiCRLConfigurationDNList/ndspkiCRLECConfigurationDNList(for 90x) attributes from the CA
- Recreate server certificates for each server in the tree so that new certificates do not have CRL DP embedded.
Once completed upgrades and new server additions will proceed without CRL verification. This should resolve the server upgrade and addition delays.
Version Specific Notes:
8.8 SP8 - 9.0.4
Upgrading, applying a patch or running ndsconfig upgrade on the CA server will add back the CRL configuration to the tree and to any certificates created afterwards. Therefore, the first two steps will have to be repeated as soon as possible after patching or upgrading the CA before any new certificates are created. (An IRF can be placed on the CRL container object to prevent this but a better alternative is to upgrade to 9.1 (see below).
9.1
A new environment variable has been added: NDSD_DISABLE_CRL_CONFIG. If this is set to any value on the RootCA the CRL object and attributes will not be automatically re-created.
Additional Information
Prereqs
Be sure to use the latest iManager (patched) and Certificate Server plugin available. As of this writing:
eDirectory 8.8.8 Patch 11 = iManager 2.7 SP7 Patch 11
eDirectory 9.0.4 - iManager 3.0.4
Steps
1. Delete the CRL object(s)
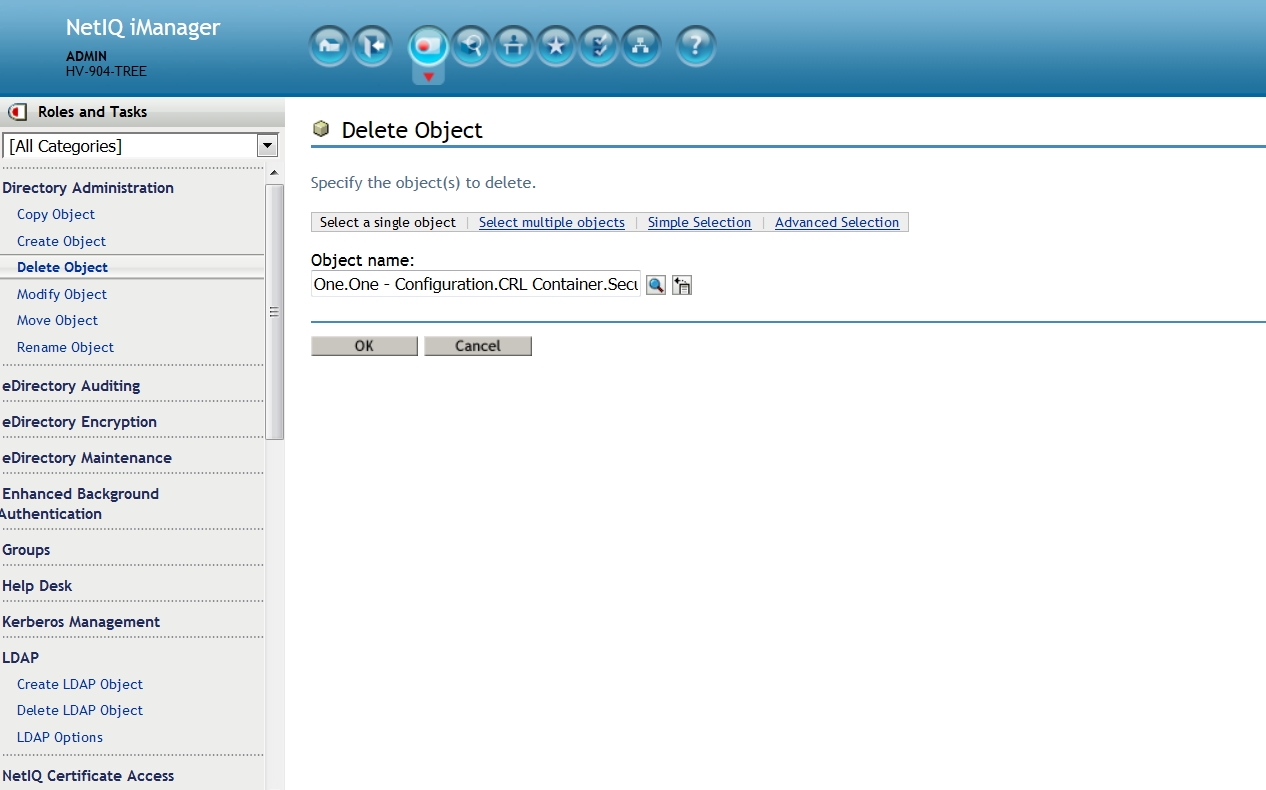
Using iManager select the Directory Administration role then the Delete Object task.
eDirectory 8.8.8 and 9.0: navigate to the One - Configuration.CRL Container.Security object. Select ok - ok - ok.
9.x
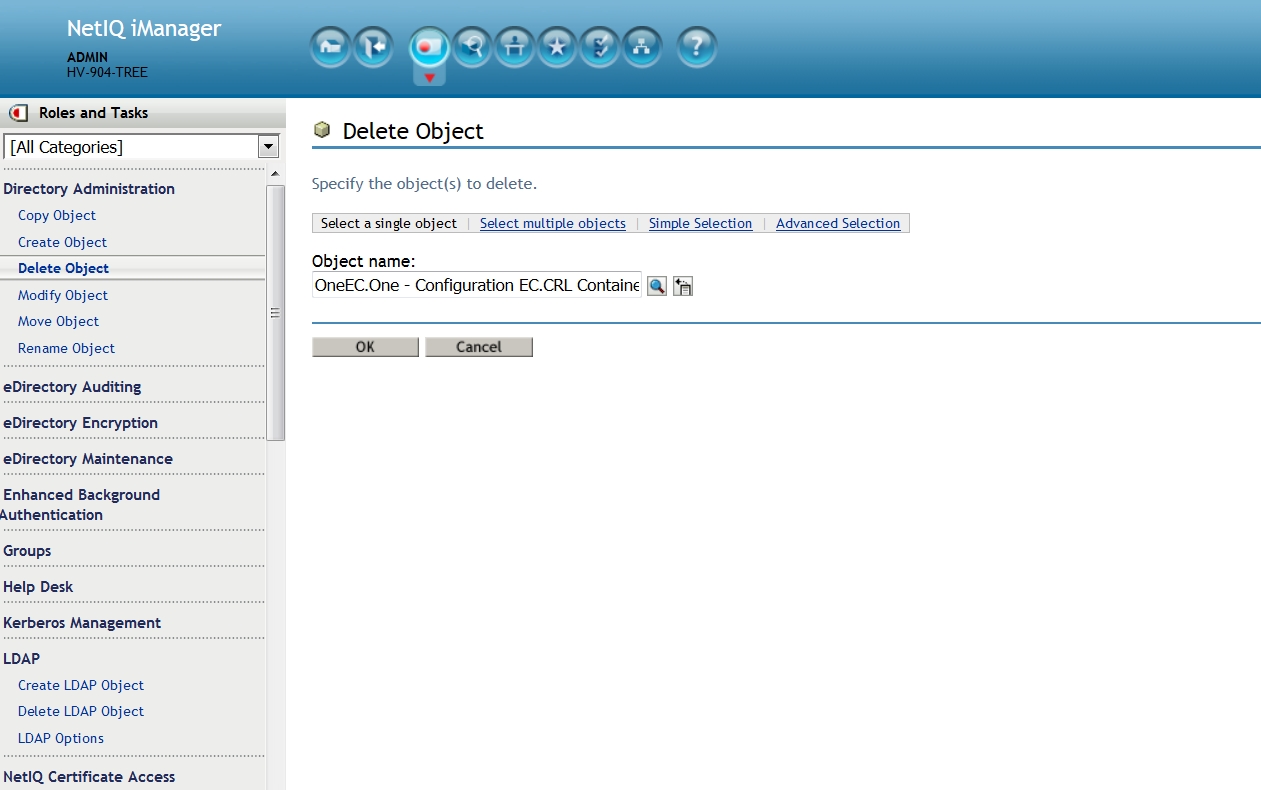
eDirectory 9.x: navigate to the One - Configuration EC.CRL Container.Security object. Select ok - ok - ok.
2. Delete the ndspkiCRLConfigurationDNList/ndspkiCRLECConfigurationDNList(for 90x) attributes from the CA
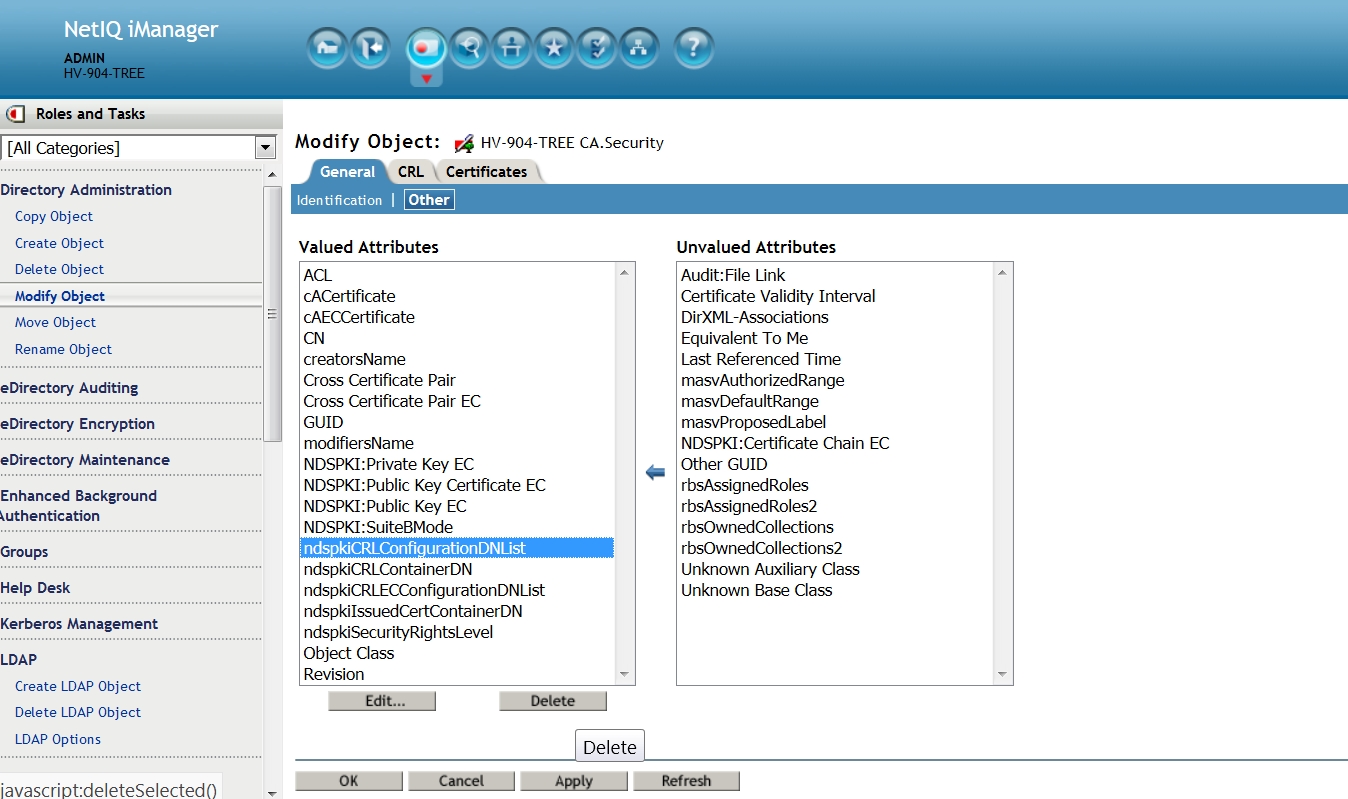
Using iManager select the Directory Administration role then the Modify Object task.
Navigate to and select the tree's RootCA. Select the General then Other tab to display the currently valued attributes.
eDirectory 8.8.8 and 9.x: select the attribute named ndspkiCRLConfigurationDNList. Then click on the Delete button. Select ok - ok.
9.x
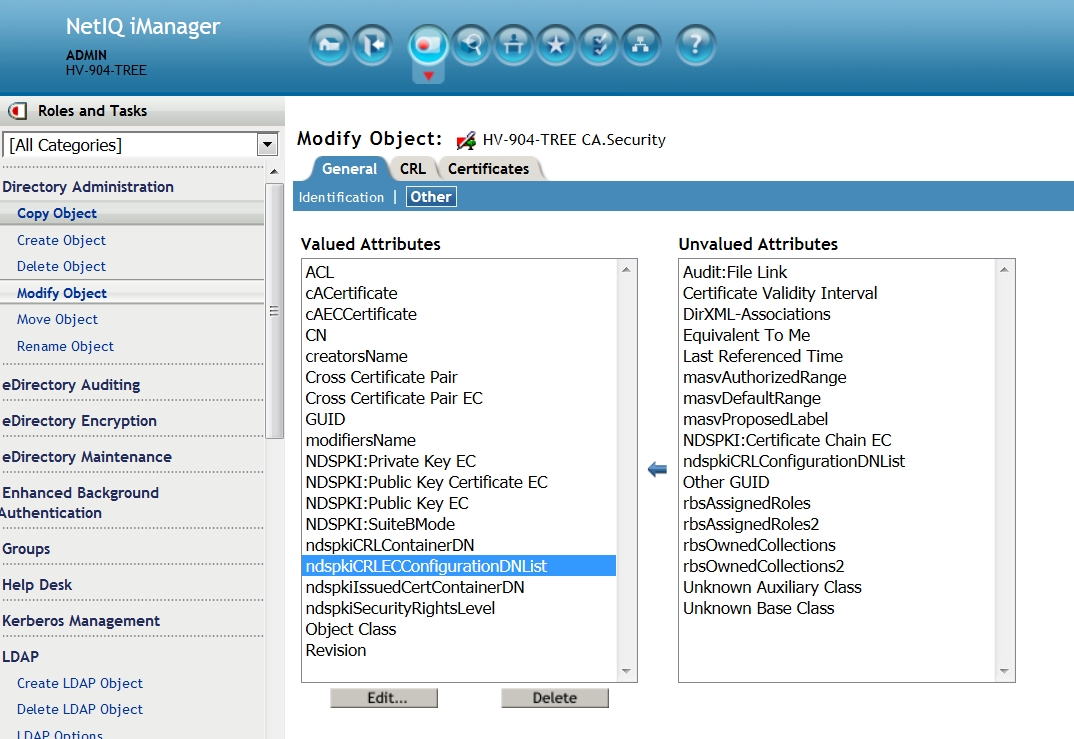
eDirectory 9.x: perform the same operation this time selecting to delete the ndspkiCRLECConfigurationDNList attribute.
3. Recreate the server certificates for each server in the tree so that their new certificates do not have the embedded CRL CDP URL.

Select the NetIQ Certificate Server role then the Repair Default Certificates task. Select the correct server for whom this operation will be performed then click on Next.
Forcing
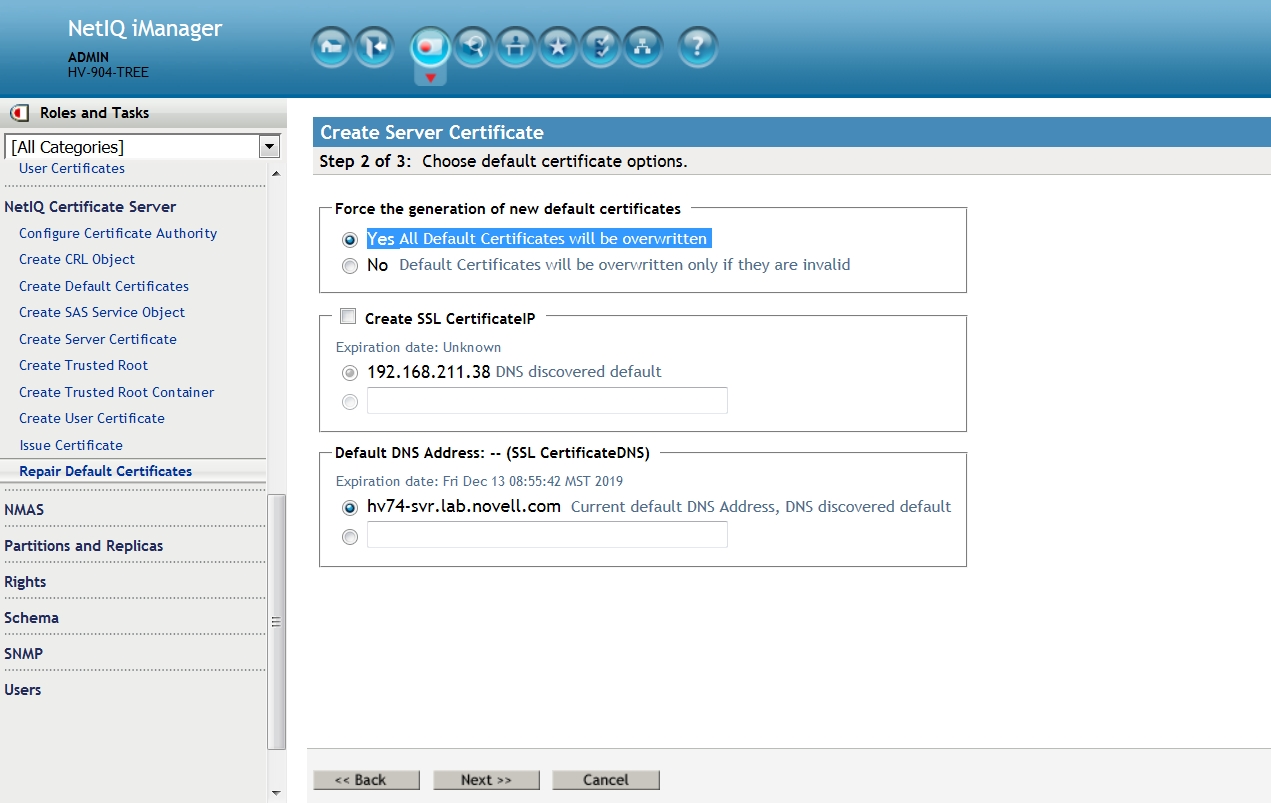
On the next screen ensure that the option to Force the generation of new default certificates is enabled. Leave the rest at their defaults then click on Next.
Result
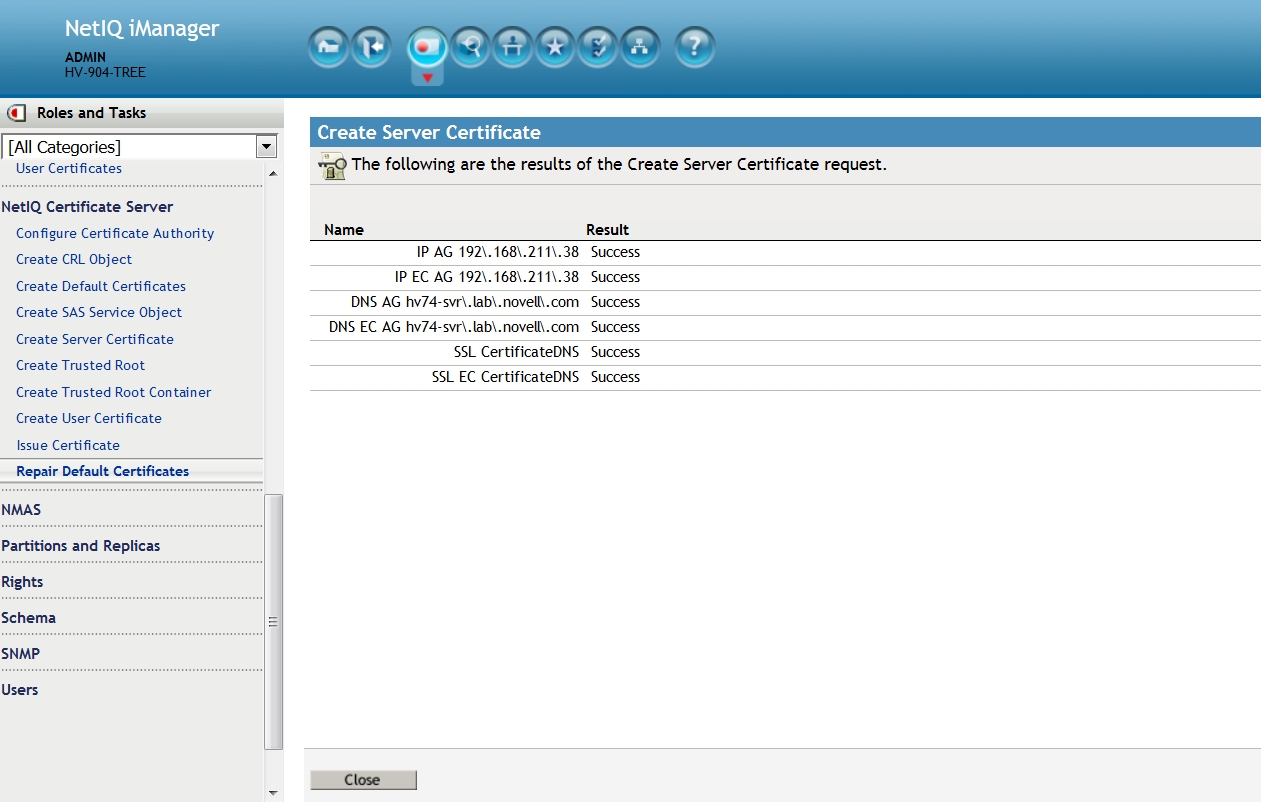
A similar result as the screen above indicates the re-creation was successful.
Verify the new server certificates do not contain CRL information.
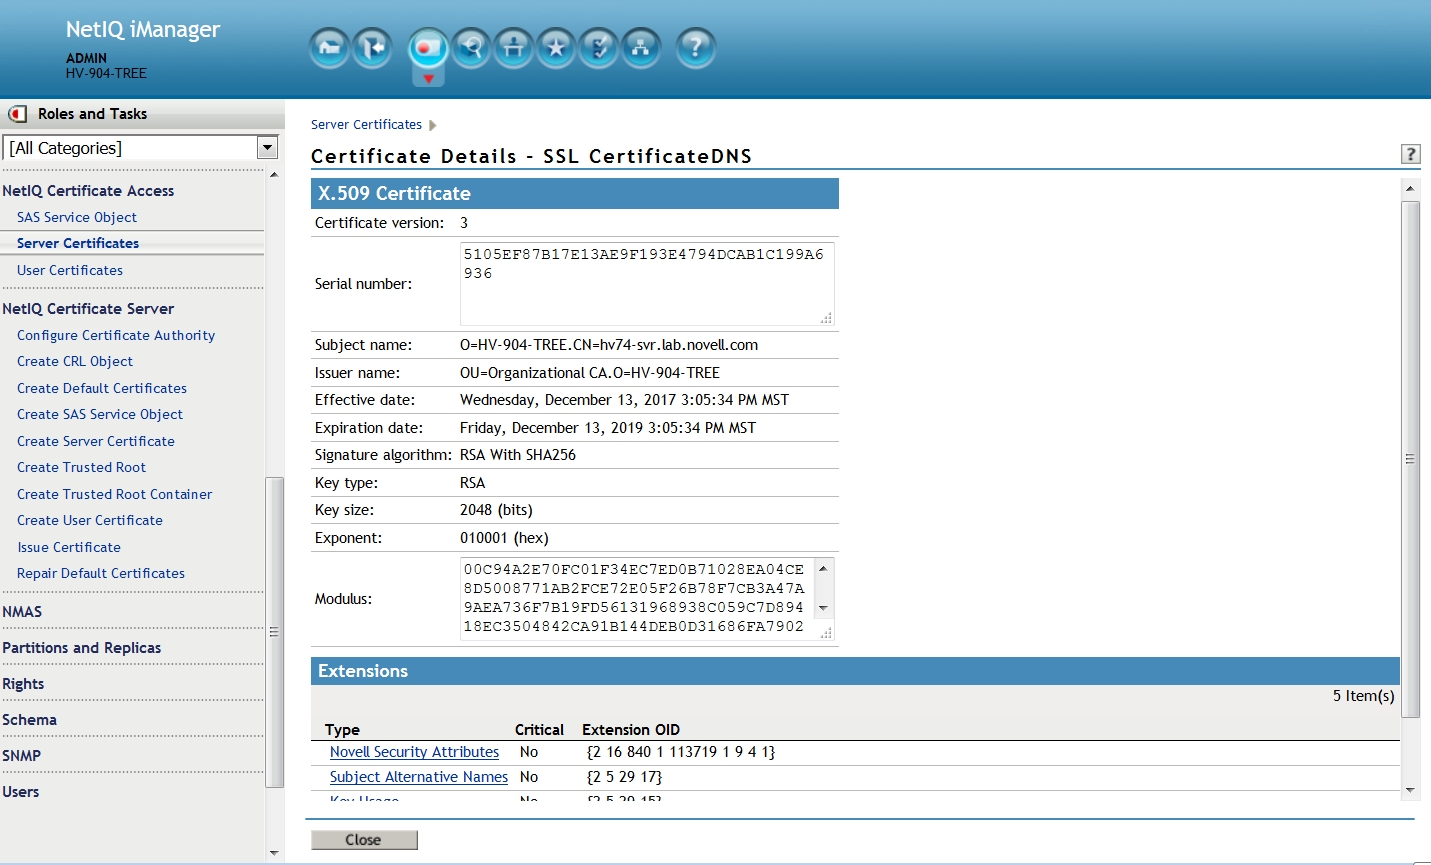

Select the NetIQ Certificate Access role then the Server Certificates task. As before ensure the correct server is selected next the top of the page. The page will show the list of certificates associated to this server. Select one of them (IE., SSL CertificateDNS). In the Certificate Details page scroll to the bottom section, Extensions.
If CRLs are enabled it will usually be the first one listed: CRL Distribution Points No {2 5 29 31} right before Novell Security Attributes.
In this case one can see that no CRL Distribution Point extension is listed in the newly minted certificate.
Be sure to use the latest iManager (patched) and Certificate Server plugin available. As of this writing:
eDirectory 8.8.8 Patch 11 = iManager 2.7 SP7 Patch 11
eDirectory 9.0.4 - iManager 3.0.4
Steps
1. Delete the CRL object(s)
Using iManager select the Directory Administration role then the Delete Object task.
eDirectory 8.8.8 and 9.0: navigate to the One - Configuration.CRL Container.Security object. Select ok - ok - ok.
9.x
eDirectory 9.x: navigate to the One - Configuration EC.CRL Container.Security object. Select ok - ok - ok.
2. Delete the ndspkiCRLConfigurationDNList/ndspkiCRLECConfigurationDNList(for 90x) attributes from the CA
Using iManager select the Directory Administration role then the Modify Object task.
Navigate to and select the tree's RootCA. Select the General then Other tab to display the currently valued attributes.
eDirectory 8.8.8 and 9.x: select the attribute named ndspkiCRLConfigurationDNList. Then click on the Delete button. Select ok - ok.
9.x
eDirectory 9.x: perform the same operation this time selecting to delete the ndspkiCRLECConfigurationDNList attribute.
3. Recreate the server certificates for each server in the tree so that their new certificates do not have the embedded CRL CDP URL.
Select the NetIQ Certificate Server role then the Repair Default Certificates task. Select the correct server for whom this operation will be performed then click on Next.
Forcing
On the next screen ensure that the option to Force the generation of new default certificates is enabled. Leave the rest at their defaults then click on Next.
Result
A similar result as the screen above indicates the re-creation was successful.
Verify the new server certificates do not contain CRL information.
Select the NetIQ Certificate Access role then the Server Certificates task. As before ensure the correct server is selected next the top of the page. The page will show the list of certificates associated to this server. Select one of them (IE., SSL CertificateDNS). In the Certificate Details page scroll to the bottom section, Extensions.
If CRLs are enabled it will usually be the first one listed: CRL Distribution Points No {2 5 29 31} right before Novell Security Attributes.
In this case one can see that no CRL Distribution Point extension is listed in the newly minted certificate.