Environment
Retain 3.x
Retain 4.x
Copying archives
Situation
Resolution
RATS is a tool that was designed to help in various ways to help with Retain. It has the ability to copy archives, indexes, sql database, and the Retain base files from one server to the other. Also there are index tools, and database query tools that can help in troubleshooting Retain.
This article will focus only on copying Retain files to another server. This will not include database backup, copy, index tools, or queries.
If you need help running the tool, please call technical support and one of our engineers can help step you through the tool.
The RATS tool is constantly changing, and improving to facilitate the needs of customers and support. On top of that, we are just a bunch of tech support guys trying to make life a little easier for our valued customers while still trying to fulfill our main job functions of helping you resolve issues in Retain and our other GWAVA products. We appreciate your understanding and patience.
Setting up an NFS Server
Before using RATS it is best to setup a mount point to the destination server so that the data can be transferred easily. Setting up an NFS server, and mounting it is the simplest way to do this. Setting up an NFS server on Linux can be done in YAST.
Mounting to NFS Shares
To mount the location from the NFS Share on the destination server go to /mnt directory on the linux box and create a new directory.
Get out of the /mnt directory, and then in the terminal command line type:
mount -t nfs <exported path> /<local mount path
- exported path is the NFS Share on the Windows, or Linux box.
- local mount path is the directory you created in the /mnt directory.
Note: For best practice it is best to set up a separate volume for each of the components of retain. Archive, Index, Retain Program (Base), and MYSQL. You will need to share them on the Destination Server, and mount them each individually on the Linux box.
Create a directory on the destination folder called archive, as this is what RATS will look for when transferring the data across to the destination server.
Running RATS Utility
1. Launch the RATS console by going to a terminal window on your Retain server (or through PuTTY):
Type: rats [ENTER]
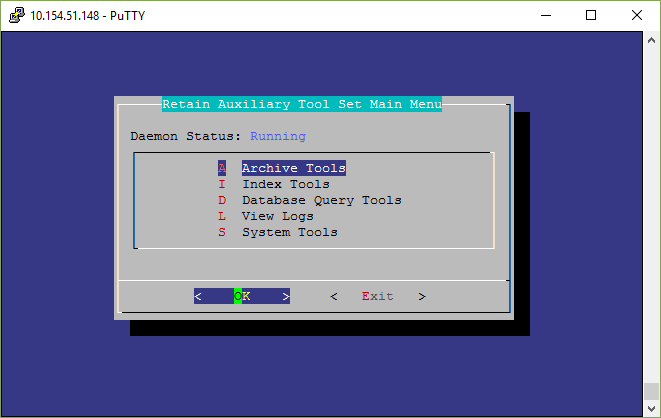
2. Select “Archive Tools", (highlighted by default). Press ENTER to go into that menu.
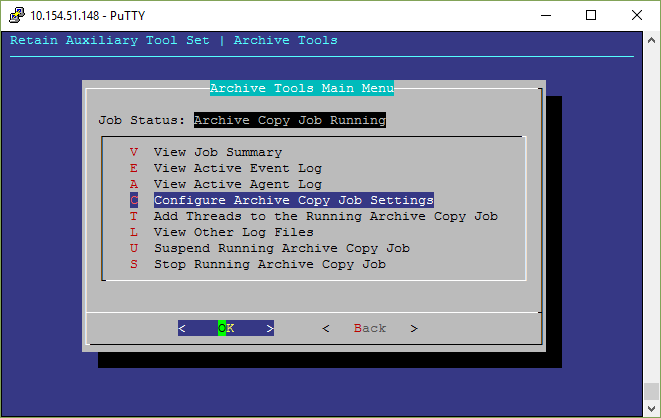
3. You first need to configure the copy job settings:
Highlight "Configure Archive Copy Job Settings" and press ENTER.
TIP: You can hit the letter "C" shortcut to take you right to it.
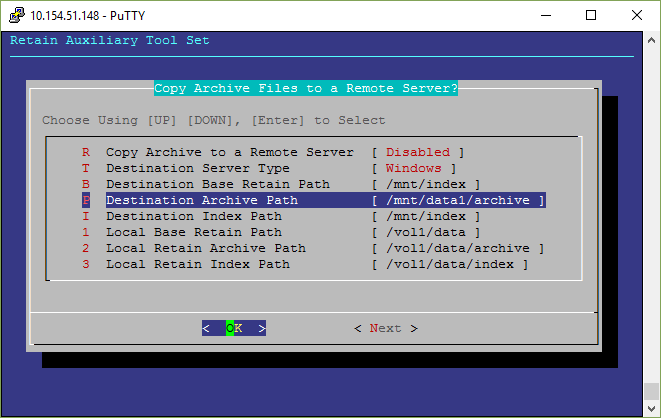
The next screen will show a slew of settings that must be configured correctly to transfer the data to the new server.
4. Keep the Copy Archive to a Remote Server Disabled.
5. For the Destination Server Type, select the correct platform you are sending your archives and other data.
6. Configure the paths to copy the files
DESTINATION PATHS: These are the paths that you are on the new server that you are sending the data and files to.
LOCAL PATHS: These are the paths where the data and files are stored on the current Retain system.
Note: RATS will attempt to find your ASConfig.cfg at /opt/beginfinite/retain/RetainServer/WEB-INF/cfg and get the paths to the archive, index and base directories from that file. You may not need to make any changes to the local paths, as the ASconfig already has them.
The
final directory in the path where your archive files are located should
be "archive", so it should be at the end of the path you specify here.
You can type the full path in Linux syntax (using forward slashes) or
use the menu under "Directories" to navigate to the path. You will
probably find it easier just to type out the full path.
TIP: Hit the TAB key on your computer keyboard to move around in the dialog window. 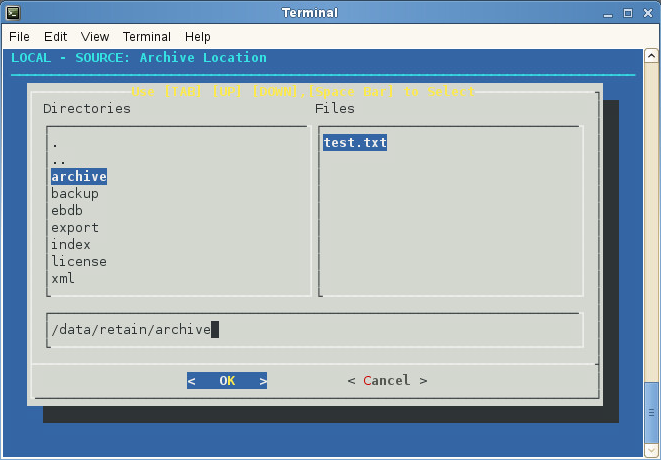
Once you have the desired path in the path field - and with the OK button highlighted in blue - press ENTER.
TIP: You can also use your mouse to click on the button.
c. Select the DESTINATION to which your archives will be copied.
Again, the end of your path should include the "archive" directory name.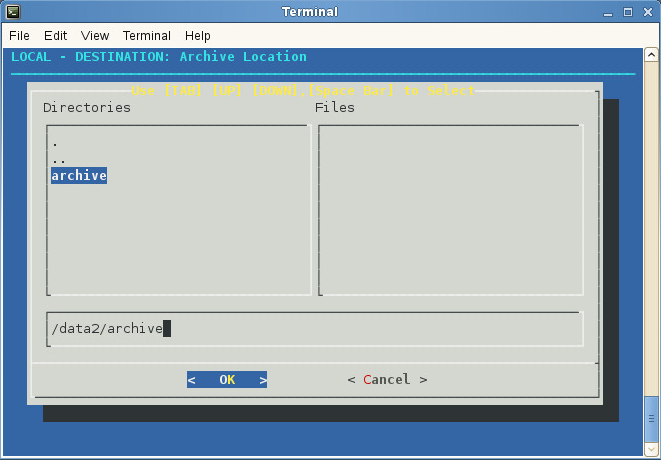
Once you have the desired path in the path field - and with the OK button highlighted in blue - press ENTER.
Highlight Next (Use the Tab) and hit [ENTER]
Another screen of settings appears. These settings enabled, and disable the copy of the different components of Retain, how many threads to run, mysql backup, tests, and logging settings.
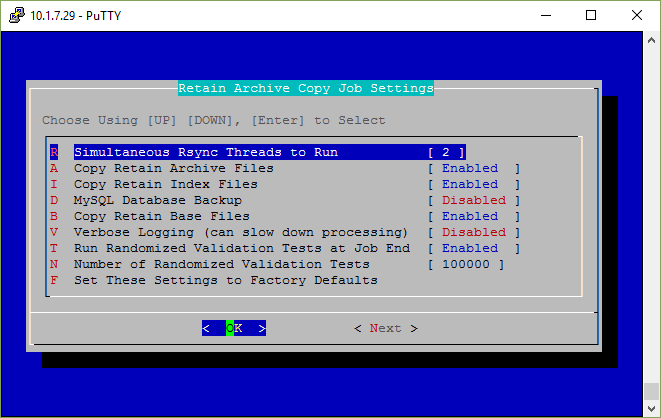
6. Configure the number of rsync instances the tool will launch.

The
tool uses rsync to copy the files. We have found that most servers can
handle running multiple instances of rsync, each instance copying files
simultaneously. For most, 4 threads seems to be a good number to start
with; however, while the copy process is running, launch the Linux top
command and look at the impact on the server:
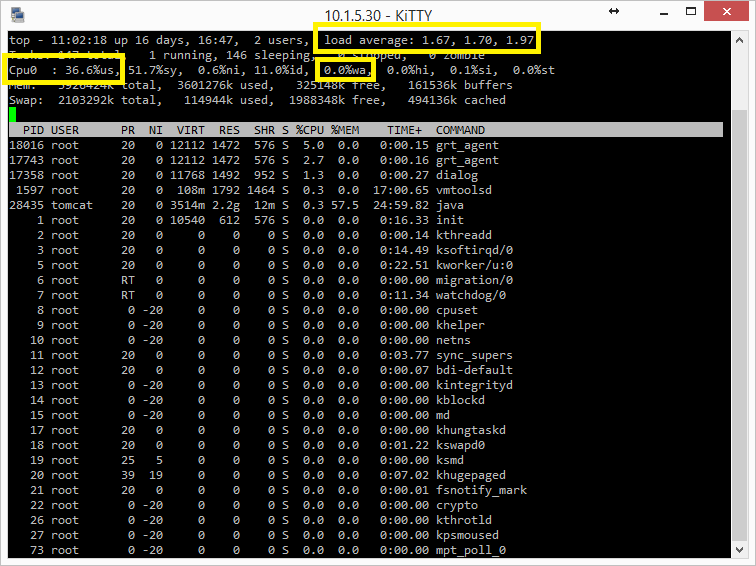
We
will come up with specific recommendations as we gain more experience
with this. For now, we'll just point out a few things that could be key
indicators of whether the system is stressed or whether it can handle
more threads:
The "wa" percentage (waiting for I/O). This is percentage of time that any process on the server has had to wait for I/O.
The CPU percentage (if you have more than one CPU as most systems do, hit the number "1" on your keyboard to display all CPUs).
The load average.
If these numbers are low, consider increasing the number of threads. You can increase threads or "retire" threads to decrease them from the "Archive Tools Main Menu", which is discussed in step #4,
"Running the Job".
7. Enable the different processes for copying Retain files, or Backup of MYSQL by highlighting them and hitting [Enter] – Enabled.
You won’t need to do anything else with any of the other settings.
The other settings to enable verbose logging, run randomized validation tests at the end of the job, and to set the number of validation tests.
All of these are optional. You may want to leave logging at the "factory defaults" of being disabled unless you experience issues on a first run.
The randomized validation tests randomly select directories from the SOURCE and compare their contents to the DESTINATION. It will report any discrepancies. You can skip these tests if you are under a time crunch and want to get Retain up and going on the new server ASAP. Our experience with rsync is that it just does its job and does it right the first time.
When you are done, highlight the NEXT button and press ENTER.
8. Start the copy job by highlighting "Start Archive Copy Job Now" and pressing ENTER.
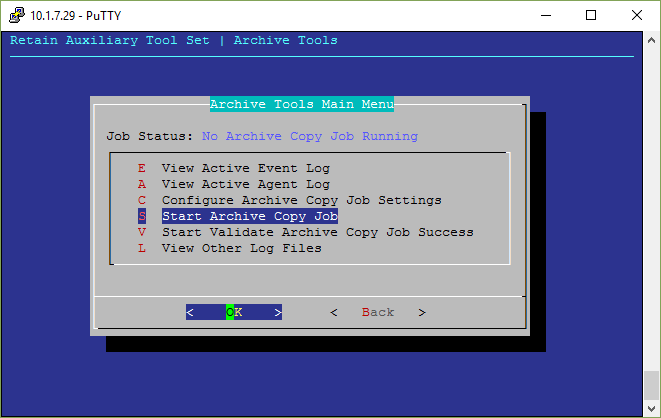
Now
that the job is running, new menu options appear on the "Archive Tools
Main Menu". For example, you can add more rsync threads on the fly to
your job or decrease threads by "retiring" them. Since this tool is
continually under development, more menu options will likely be added
that are not showing on this screenshot.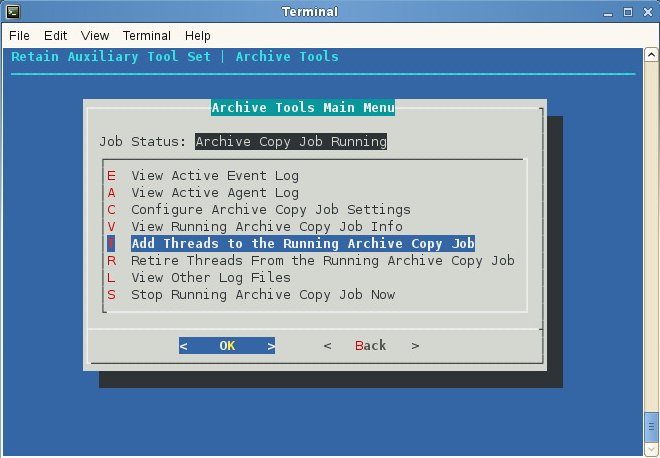
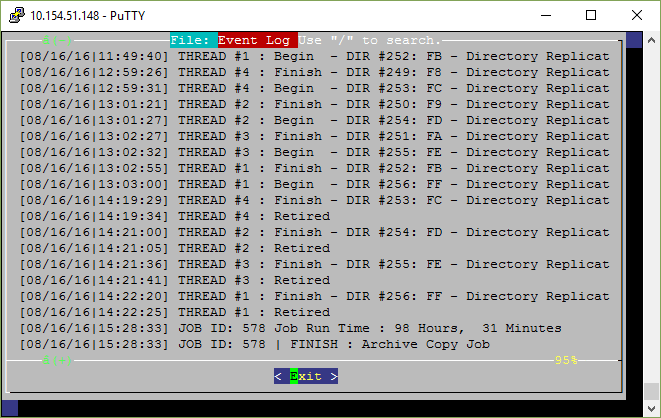
9. Finally, you can keep track of the progress of the archive process by looking at the logs, either the active log or the static log. Select View Active Event, or Agent log for where the process is and how it is running. When it is finished it will say the job has finished at the end, and give the time it has taken to run.
The logs are also a good place to look to see any errors and correct anything in the configuration that might be incorrect.