Environment
GWAVA 4 on NW or Linux (Any build)
Situation
How does a GWAVA MTA scanner work? How can an MTA scanner be installed?
Resolution
1) Understand how messages flow with an MTA scanner and which programs are involved
2) Configuring the MTAIn order for MTA scanning to work correctly there must be cooperation between Novell programs and GWAVA programs.
When the MTA has been configured correctly, it will know that messages need to be scanned before delivery. The MTA will queue those messages up in the <domain>\mslocal\gwvscan\0-7 directories. Once the MTA decodes the message it is placed in the ...\mslocal\gwvscan\vs00-vs## folders. At that point the MTA tells GWMTAVS that there are message to be scanned. GWMTAVS then contacts VS and tells it to scan the message. VS in turn makes a copy of the message in the ...\mimework directory and then tells GWAVA to scan the copy of the message. GWAVA will then scan the message and report back to VS if the message is good or bad. VS then reports the status to GWMTAVS and then GWMTAVS reports the status back to the MTA. If the message is good then the MTA will allow the message to pass through the system. If the message is bad then the MTA will simply delete the file and not allow it to be delivered.
GWMTAVS and VS do not do any decoding or scanning. Their main purpose is to handle communication between the MTA and GWAVA. The majority of the work is done when the MTA decodes the message and when GWAVA actually scans the message.
.jpg)
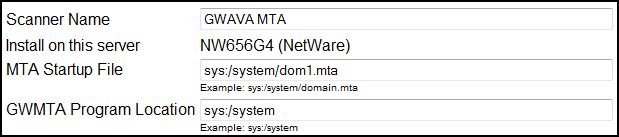
In order for the MTA to allow scanning of messages, there are some startup switches that must be present in the MTA startup file. Refer to the diagram above for the most likely location of this file. These swtiches normally appear at the bottom of the startup file. The switches that can be used are below.3) VS and vsnamevalue or GWAVAMTA.XML
Required: /vscan-EXCLUDE
/vstype-MESSAGE
/vsnamevalue-<Scanner ID XML> <--In build 118+ the scanner's object ID is placed here instead of the gwavamta.xml file.
/vsthread-50 <-- This is the number of threads the GWAVA will use to scan the files (default is 50). This can be modified if necessary.
/vsdomain-DUMMY
/vsport-7108
/vsaction-DISCARD
Optional: /vsnoadm <-- GroupWise 7.01 or greater is required. This switch will make it so that admin messages are not scanned. It is highly recommended that you use this setting if your GroupWise version supports it.
/vsnostatus <-- GroupWise 7.03 or greater is required. This switch will make it so status messages are not scanned. It is highly recommended that you use this setting if your GroupWise version supports it.
With these switches in place at the bottom of the MTA startup file, the MTA will start and then realize that it needs to load GWMTAVS. GWMTAVS will then load VS automatically. Because these files are loaded by each other it is necessary for them to be in known locations. On NetWare GWMTA, GWMTAVS, and VS will all be in the same location. On Linux, GWMTA and GWMTAVS will be in the same location, with libgwvsmod.so (Linux equivalent of VS) in the library directory instead.
Note: The VS program is the only GWAVA program that doesn't reside in the <GWAVA4>\assets\bin direcotory.
When VS loads it needs to inform GWAVA that it will be requesting message scans. In order for those scans to be with the correct configuration VS needs to tell GWAVA which scanner iD to use. VS will obtain the scanner ID through the /vsnamevalue switch in the MTA startup file for builds after 118. It is preferred that the scanner ID be provided in the MTA startup file for clustering compatibility and convenience. An example of what that switch should look like inside your MTA startup file is:4) Installing an MTA scanner
/vsnamevalue-<gwavaman><mta_agent><id_object>13vv6k4.13vv6k4.13vv7em</id_object></mta_agent></gwavaman>Prior to build 118 VS pulled the ID from the gwavamta.xml file. This file contains a scanner ID that VS will then use to communicate with GWAVA. This file is necessary in order for scanning to function correctly if the /vsnamevalue switch is not present. The file simply contains a scanner ID like the following:
<gwavaman><mta_agent><id_object>13vv6k4.13vv6k4.13vv7em</id_object></mta_agent></gwavaman>
Note: Refer to the diagram above for the location of this file.
Fortunately, GWAVA will walk you through the process of installing an MTA scanner. From your GWAVA management console, select Wizards, and then select 'GroupWise MTA Interface' and click continue. Now enter the correct locations for the files. Please refer to the example directories above for more information.5) Turn the MTA scanning on
Now you can finish the wizard, and all of the correct files will be in place.
Because we added some startup switches to the MTA startup file, the MTA must be restarted before scanning will occur. Once you have restarted the MTA it will follow the processes as outlined above for message scanning.6) Load the scanner in the correct order
To ensure smoothest operation of an MTA scanner you need to load things in order. Because VS will try to contact GWAVA as soon as it is brought up, you should have GWAVA loaded before the MTA comes up. Conversely, if you plan on restarting GWAVA, you should shut down the MTA before restarting GWAVA. Remember that in order for proper scanning to occur both the MTA and GWAVA must be up and communicating correctly.
Proper statup sequence:
Load GWAVA
Load MTA
Proper shutdown sequence:
Unload MTA
Unload GWAVA
It is also important to make sure that when the server is restarted that the programs load in the correct order. Below is a sample snippet from an autoexec.ncf in NetWare:
########## GWAVA4 ########## 4/11/2008 11:6:4For linux you need to change the order in which the startup/shutdown scripts are run. Browse to the /etc/init.d directory. In this directory you will notice there are some directories that represent each runlevel (rc3.d for runlevel 3 and rc5.d for runlevel 5). GWAVA and GroupWise will be loaded/unloaded when the different runlevels are reached. You will notice that every file in these directories start with a K or an S (K means kill and S means start) followed by a number. This number represents when that script gets run. The lower the number the sooner it will happen. So if I have a file named S09gwavaman, it means that GWAVA will be loaded ninth. As long as the gwavaman start script has a lower number than the grpwise startup script you're in good shape. You will want to make sure that GWAVA loads before GroupWise in both the rc3.d and rc5.d folders.
SEARCH ADD VOL1:\GWAVA4\ASSETS\BIN <-- Add a search path for GWAVA
VOL1:\GWAVA4\ASSETS\BIN\gwavaup.ncf <-- Load GWAVA
sys:\system\gwsrch.ncf <-- Add a search path for GroupWise
sys:\system\grpwise.ncf <-- Start the GroupWise MTA and POA
sys:\system\gwia.ncf <-- Start the GroupWise GWIA
7) Load the MTA in Protected Memory (recommended, NetWare)
Although it is not required, it is a good idea to load the MTA into protected memory when using an MTA scanner. This can help prevent many abends before they ever occur on NetWare. To load the MTA into protected memory, all you have to do is modify the grpwise.ncf file. Below is an example of loading the GroupWise MTA into an address space named "MTA".
LOAD address space = mta sys:\gw8\GWMTA @dom2.mta
Additional Information
This article was originally published in the GWAVA knowledgebase as article ID 447.