Environment
Novell Access Manager 3.1
Novell Data Synchronizer Mobility Pack
Situation
Purpose:
How to configure Novell Access Manager for Novell Data Synchronizer Mobility Pack
How to frontend Novell Access Manager with Mobility Pack
Symptoms:
Unable to connect to Mobility Server from Android Devices using Path Based Reverse Proxy
Android Devices are unable to connect to Mobility Server using Path Based Reverse Proxy but iOS devices work
Resolution
iOS Devices can connect to Mobility Server with Access Manager using Path Based Reverse Proxy but some Android Devices do not work with Path Based Reverse Proxy. Please follow the steps below to set up an explicit Domain Based Configuration of the URL for Mobility Server
The following configuration allows Device to connect to the Access Manager on Port 443. Access Manager connects to Mobility Server on Port 80
Mobility Server Configuration:
-
Login to Mobility WebAdmin.
ttps://IPAddressOfMobility:8120 -
Click Mobility Connector (mobility).
-
Uncheck Secure and make sure Connector Port is set to 80.
-
Click Save Custom Setttings .
-
Type "rcdatasync restart " and press Enter.
Access Manager Configuration:
-
Login to Novell Access Manager Administration Console.
ttp://IPAddress:8080/nps -
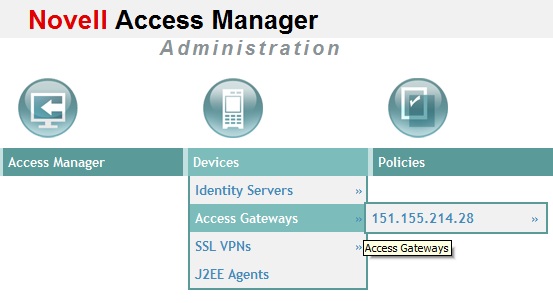
Click Devices | Access Gateways | IPAddress of Access Gateway as shown below
-
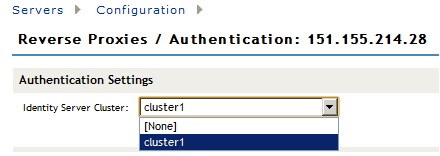
Click Reverse Proxy/Authentication
-
In the Identity Server Cluster, please select the configuration that has been assigned to the Identity Server if it not already selected
-
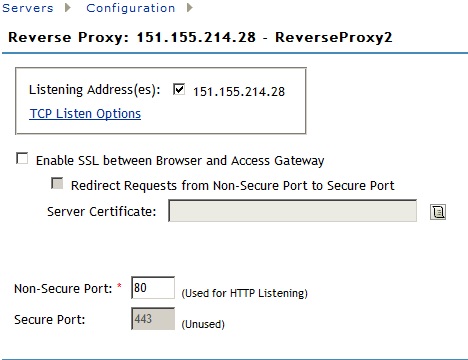
In the Reverse Proxy List , click New and type in a Reverse Proxy Name and click OK. A page similar to the following is displayed
-
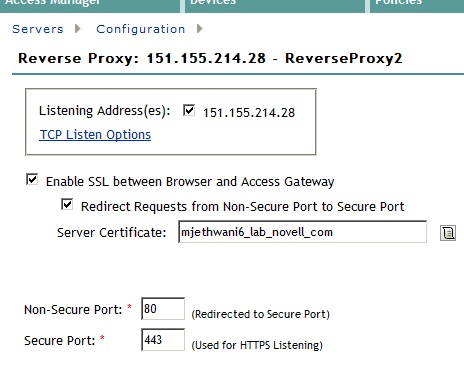
Click on Enable SSL between Browser and Access Gateway
-
In the Server Certificate , click Browse and either create a new Certificate or import a Certificate from a Trusted Authority. It is recommended to import a Certificate from a Trusted Authority.
-
Click New in Proxy Service List
-
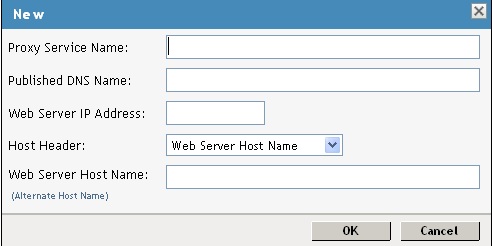
The following screen appears
-
Fill in the fields
Proxy Service Name : A display name for the proxy service.
Published DNS Name : The DNS name that the users will type on the Device while configuring Mobility on the device. For the first proxy server, the DNS name must resolve to the Access Gateway IP address that was selected as the listening address.
Web Server IP Address : The IP address of the Mobility Server Web server.
Host Header : Select Web Server Host Name
Web Server Host Name : The DNS name of the Mobility Server -
Click OK.
-
Click the Proxy Service that was just created.
-
Click Protected Resources .
-
In the Protected Resource List , click New .
-
Type in the Name and click OK
-
Optionally, specifiy a description for the protected resource.
-
In the Contract field, select None.
-
Leave the URL Path List as /*
-
Click OK.
-
In the Protected Resource List, verify that the protected resource you created is enabled, then click OK.
-
Click Devices | Access Gateways.
-
To apply the changes, click Update | OK
Until this step, nothing has been permanently saved or applied. The Update status pushes the configuration to the server and writes the configuration to the configuration data store. When the update has completed successfully, the server returns the status of Current. -
To update the Identity Server to establish the trust relationship with the Access Gateway, click Devices | Identity Servers Update , then click OK.
Wait until the Command status is Complete and the Health status is green.
Device Configuration:
On the Device while configuring the Mobility Account, type the DNS Name of the Access Manager and it should redirect the request to the Mobility Server.