Microsoft Windows Server 2003 Enterprise Edition
Microsoft Windows Server 2003 Standard Edition
Microsoft SQL 2000
Microsoft SQL 2005
Microsoft Windows 2000 Advanced Server
Microsoft Windows 2000 Server
At the end of the ZENworks Single Server Install the Management Service Installer fails to complete with the following 4 check boxes are left unchecked:
- Registered with Distribution Service
- Initialize the Distribution Service data
- Create Encryption Management Key
Publish Management Data
At the end of the ZENworks Single Server Install the Management Server Installer checks 80 and 443 communication as well as database communication. If any of these communication checks fail you will encounter the issue with the screen shot above.
Possible issues
There are many possible issues but the first things to check would be the IIS configuration.
ZESM has the following IIS configuration requirements
Required ports are 80 and 443 as well as the default website. Make sure no other applications are using these ports.
Net Framework 1.1 is the required version of ASP.NET for ZESM.
To verify go to administrative tools and open IIS (Internet Information Services Manager), in the left hand pane expand out the "Web Sites” folder and right click the default website, go to properties, click the ASP.NET tab and verify in the drop down box that version 1.1.4322 is selected. This tab will only show up if .NET framework 2.0 or 3.0 are installed if the tab does not show up than IIS is using version 1.1.4322.
Update. ZESM IR5 and current releases of ZESM have changed the .NET framework requirement from 1.1 to 2.0. If using a version of ZESM that is IR5 (3.5.160) or more recent make sure IIS has version 2.0.50727.
Ensure that ASP.NET is allowed (v1.1.4322 for ZESM versions prior to ZESM IR5 and 2.0.50727 for IR5 and forward) to verify go into IIS, select the "Web Service Extensions folder and verify ASP.NET v1.1.4322 or 2.0.50727 depending on ZESM version is allowed.
In the properties of the default website click on the Directory Security tab and under Secure Communications click the "Edit” button and make sure"Require secure channel (SSL) is unchecked. Also ensure that the "Ignore client certificates” radio button is selected. Go back to the Directory Security tab and select the "Edit” button under "Authentication and Access control” and ensure that "Enable anonymous access” is checked.
Once IIS is configured correctly go to C:\Program Files\Novell\ESM Single Server\AuthenticationServer\Bin and run the"ManagementServerInstaller.exe”. The Management Server Installer will re-run the communication checks to make sure everything is installed correctly. If the check boxes fail to complete again please check the following:
The install should have created 3 websites (AuthenticationHelper, AuthenticationServer and PolicyServer) check IIS to validate the websites were created. To validate open IIS, expand out the websites folder and expand out default website and see if the website were created. If the website were not installed go to Add/Remove programs and uninstall the ZESM Single Server Install and reinstall.
Validate that the following website can be resolved with out any errors.
http://machinename/policyserver/shieldclient.asmx
https://machinename/policyserver/policyserver.soap?wsdl
https://machinename/authenticationserver/userservice.asmx
If one or all of the websites fails to resolve properly validate the application pool in IIS is running. Problems have occurred with the application pool in IIS when IIS was installed using a disk from a different OS version. For example the server is Windows 2003 Enterprise Server and when installing IIS a Windows 2003 Standard Server disk was used. If this occurs IIS will need to be reinstalled using a disk that is the same OS version that is running on the server.
If 80 and 443 communication continues to fail (website URLs are failing to resolve) check the Local Security Policy for the following:
Under Local Policies - User Rights Assignment verify the "Guests" group or the IUSR account is not a member of the following User Rights Assignments
If the "Guests" group is a member of any of these User Rights Assignments do the following:
Go to "Local Users and Groups" and remove the IUSR account from the "Guests" group.
In addition also check the Local Security Policy and verify the System cryptography: Use FIPS compliant algorithms for encryption is disabled. This is found under Local Policies - Security Options
After validating communication and IIS configurations are correct and the Management Service Installer continues to fail with the same 4 check boxes verify SQL communication is working properly.
During the installation of ZESM 3 databases are created with 3 SQL accounts to administer the databases once the installation is complete.
If the default names are used during the installation the database names are as follows:
STDSDB
STMSDB
STRSDB
With the following SQL accounts:
DS_STDSDB_User
MS_STMSDB_User
RS_STRSDB_User
In troubleshooting situations the osql tool can be used validate SQL communication.
To verify the ms_stmsdb_user SQL account is functioning properly type the following from a command line.
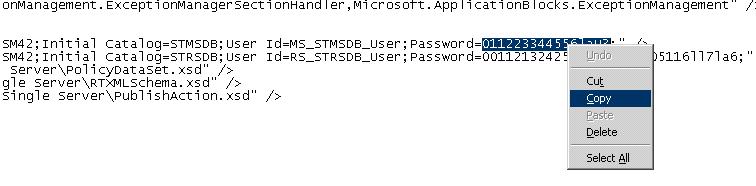
After hitting return the command prompt will prompt for the password. During the ZESM installation the administrator will be prompted to enter a password for the SQL accounts. The password for the ms_stmsdb_user and rs_strsdb_user accounts are changed into hashed passwords in the config file but the password for the ds_stdsdb_user is not hashed so it's the same password entered during the install. These hashed passwords can be found in C:\Program Files\Novell\ESM Single Server\AuthenticationServer\bin in the ManagementServerAgent.exe.config.
Open the ManagementServerAgent.exe.config file with notepad and copy the hashed password.
Paste the hashed password in the command prompt and press enter. If the SQL account communicates correctlya 1 will be returned otherwise an error will be generated providing additional information to help troubleshoot the issue.
If a failure occurs where the SQL account cannot be found open the Microsoft SQL Server Management Studio Express and verify in the "logins” container the ZESM SQL accounts were created at installation. If the SQL accounts were not created, create them in the Management Studio. When creating the Zenworks SQL accounts ensure the following:
The passwords are the same hashed passwords found in the ManagementServerAgent.exe.config and the correct default database is selected (i.e. login name MS_STMSDB_User has a default database of STMSDB).
The server role is sysadmin
The User Mapping is for the appropriate database and public is selected for the database role.
Once SQL communication is validated for the 3 ZESM SQL accounts re-run the ManagementServerInstaller.exe which can be found at C:\Program Files\Novell\ESM Single Server\AuthenticationServer\Bin.