Environment
Novell eDirectory 8.8.x on all platforms
Novell Certificate Server
Situation
Trusted Root certificate is still valid
How to renew an expired third party (i.e. Verisign) server certificate in eDirectory.
Resolution
IMPORTANT:These steps will only work if the new certificate sent to you by the external authority is minted using the same CSR that was originally sent to them. If the external company requires you to delete the existing SSL certificate in the tree and generate a new one, you will need to follow the steps outlined inTID 3033173 - How to import a Production VeriSign External Certificate into eDirectory 8.7.3
We will be using iManager 2.6 to perform these steps. You must have at least version 3.220.20070416 or greater of the Novell Certificate Server Plug-ins for iManager installed in iManager. To verify this, log into iManager and select Configuration and then select "Plug-in Installation" on the left and then "Installed Novell Plug-in Modules". You should see the following listed or something newer:

If your version is older, then download the latest plug-in and install it. Once you have verified the plug-in version meets the requirements you can continue with the steps outlined below.
The first step is to export the entire certificate including the Private key to a PFX file. This is done as a backup of the server certificate just in case something goes wrong.

1. Using iManager, log in as a user with administrative rights to the server and under the "Novell Certificate Access" role, select the "Server Certificates" task. You should see something similar to the following:
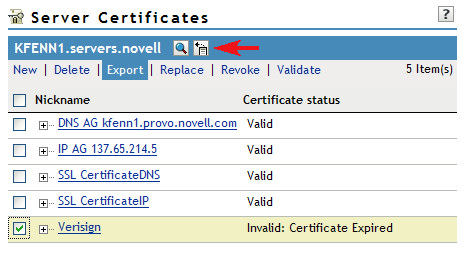
2. Place a checkmark next to the certificate that needs to be backed up and select the Export link in the menu.
3. Select the drop down arrow next to the Certificates
field and select the certificate that you saw listed in Step
#1. You will see other Verisign certs listed in this list as
well, but don't worry about them.
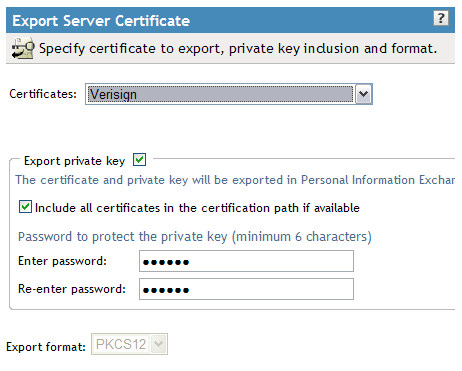
Make sure to place a checkmark next to "Export private key" and
also next to "Include all certificates in the certification path if
available". Select a password and then continue to the next
step.
4. On the next screen, click the "Save the exported
certificate" link.

You now have a full backup of the certificate that can be
restored if anything happens during the process. It is good
practice to keep this .pfx file backed up for disaster recovery
purposes.
6. Go back into iManager and back to the "Server Certificates" link and once again place a checkmark next to the certificate (Verisign in this example) and select "Export".
7. Click the dropdown next to "Certificates" and look for the bottom most certificate. This should be the trusted root certificate. In the screen shot below, the trusted root is called "Class 3 Public Primary Certification Authority".
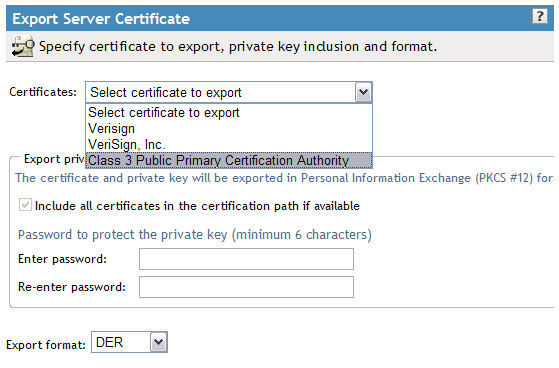

9. Perform steps 7 and 8 above with the next certificate
in the list, "Verisign, Inc." in this example and save it as"Intermediary.der"
You now have all the certificates in the certificate chain (Trusted Root, Intermediary and server) saved on your workstation. Now we need to prepare the certificate in the tree for the import. First there are 5 attributes that must be deleted on the SSL certificate object in the eDirectory tree. However, these attributes are not viewable from the"Other" page in iManager without first disabling the Certificate Server page options. Follow the steps below.
10. In iManager, select the Modify Object task under Directory Administration and browse to the SSL certificate object in question.
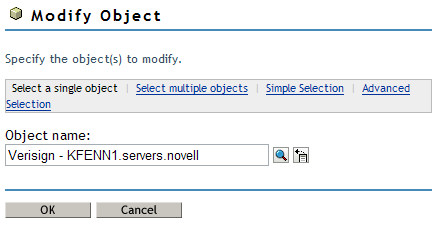
Click OK.
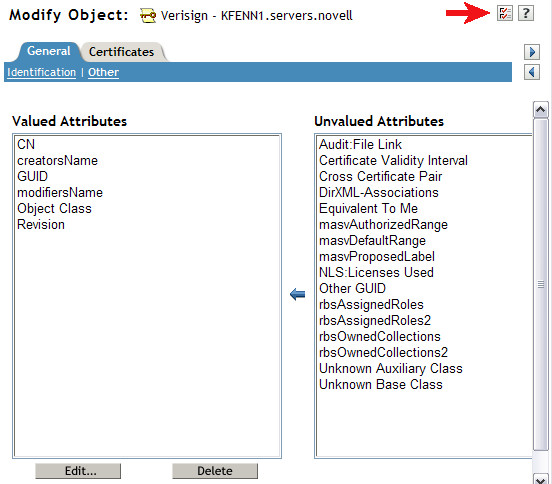
11. Navigate to the "Other" page on the General Tab and then select the Page Options icon as shown by the red arrow below.
12. On the Page Options screen expand the General and Certificates categories by clicking the "+" sign.
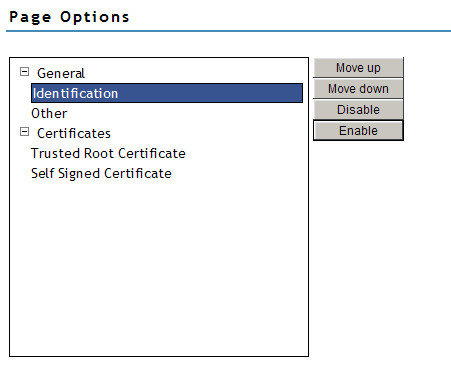
13. Highlight "Identification" and click the "Disable" Button to the right. Do the same for "Trusted Root Certificate" and "Self Signed Certificate" until your page looks like the screen shot below.

14. Click OK and you should get a message like the following:

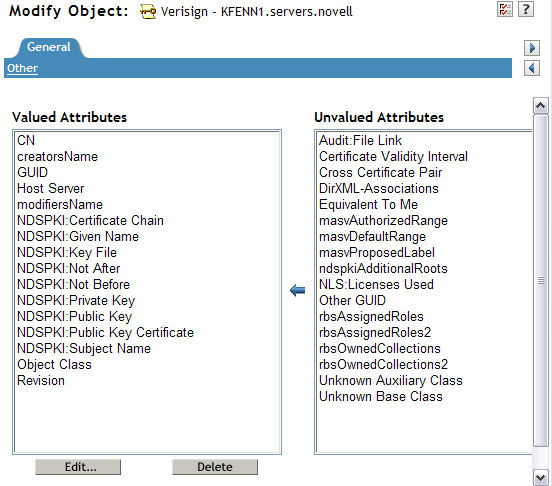
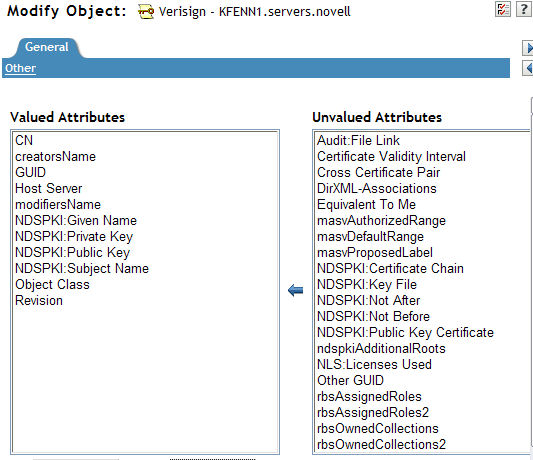
15. Select the "Modify Object" task again and browse to the SSL Certificate object again and go to the "Other" page under the General tab. You should now see quite a few NDSPKI attributes listed under the Valued Attributes column as shown below.
There are 5 attributes which should always be deleted (if present). They are as follows:
NDSPKI:Not After
NDSPKI:Not Before
NDSPKI:Public Key Certificate
If the following two attributes if present, should also be deleted:
The most common list that you will see are listed below next to
the red arrows.
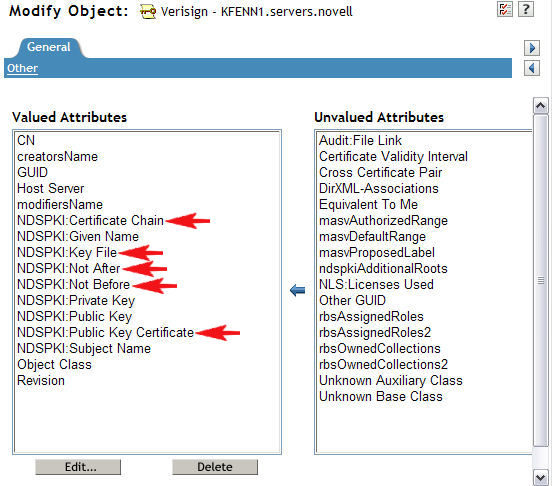
You must delete them one at a time by highlighting the attribute, selecting the "Delete", which will bring up a new window that will display the attribute data. Then just click "OK". Do this for all 5 attributes. Once they are all deleted, your screen should look like the one below.
Click Apply. Make sure you go back to the page options screen and re-enable the three page options that you disabled previously and then close the Modify Object task.
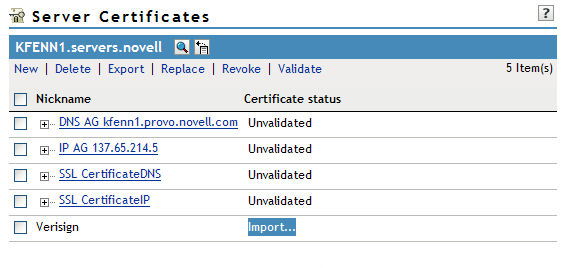
16. Go back to the "Server Certificates" task and you should see that the certificate has changed to a status of"Import..." If your certificate does not show the Import option, double check the steps above and make sure you are looking at certificates from the correct server. Go ahead and click the "Import..." link.
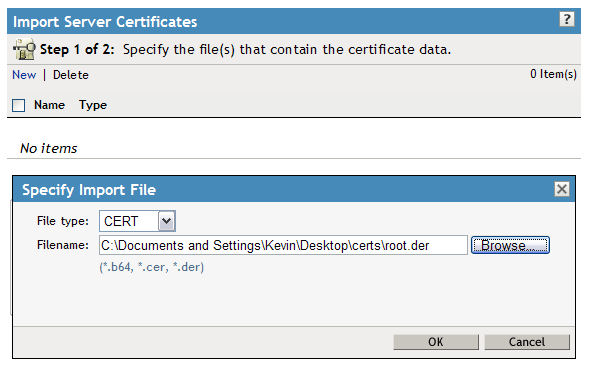
17. We now need to re-import the certificates that were exported back in Steps 5-9. Depending on what kind of certificate you have and whether you need an Intermediary certificate or not, you may only have to import two certificates. Historically, Verisign does not include their intermediary certificate in the renewal email they send to their customers. You will need to check with the certificate vendor and find out if the certificate they sent includes any other certificates in the chain (i.e. Trusted Root or Intermediary) or if it's just the public key certificate for your server. In our example, we do have an Intermediary certificate that was NOT included in the renewed server certificate and thus we will be importing 3 certificates.
You'll see the screen below and the option to browse to a file after you click "Import". Click the Browse button and browse to the Trusted Root certificate exported in Steps 7 and 8. Once you have the correct certificate, select OK.
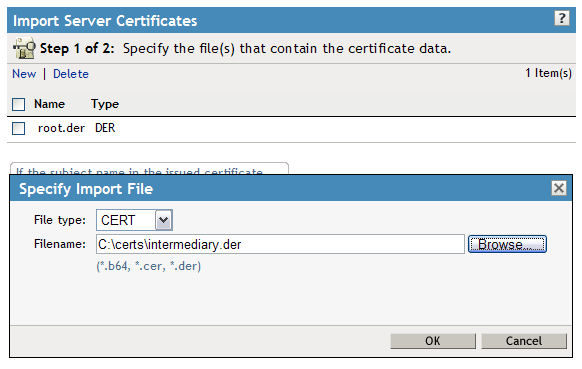
The certificate should now be listed as shown below:

18. Now let's import the Intermediary certificate exported in Step 9. This time you will need to click "New" in the menu for the browse window to pop up. Browse to the correct certificate and click OK.
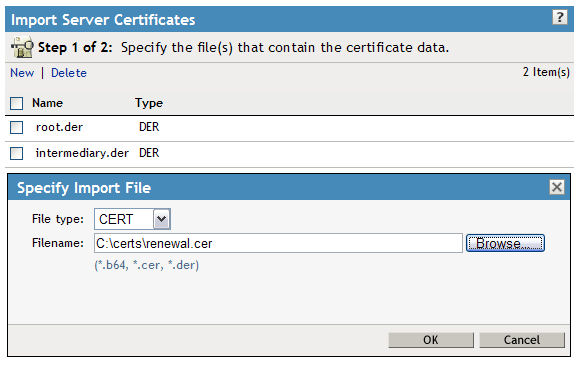
19. Two certificates should now show up in your certificate list. Finally we need to import the "new" certificate sent to us by Verisign that we converted to a file in Step 5. Click"New" again and browse to the renewal certificate and then click OK.
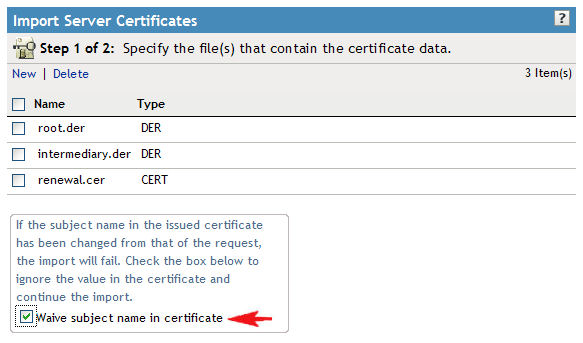
20. You should have all three certificates now in the list. Often certificate companies will slightly modify the subject name of the certificate when they send it back to you. It might be a good idea to check the box next to "Waive subject name in certificate" to prevent any failures during the import.
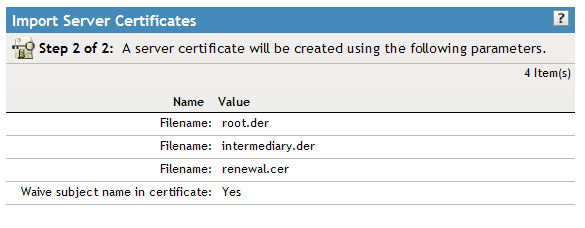
21. Click "Next" and you'll be presented with a summary screen as shown below. Verify that the certificate names are correct and then finish the wizard.
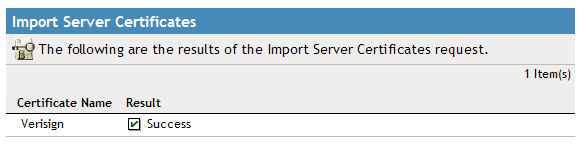
22. You should receive a Success message as shown below.
If you get any errors at this point, look up the error code and that will give you an idea of what the problem may be. A common error is a -1227, which is a PKI BROKEN CHAIN error. Most of the time this is due to a misunderstanding in what certificates are actually included in the renewed certificate sent to you by the certificate company. Verify with the 3rd party company what certificates are actually included in the certificate that they sent to you.
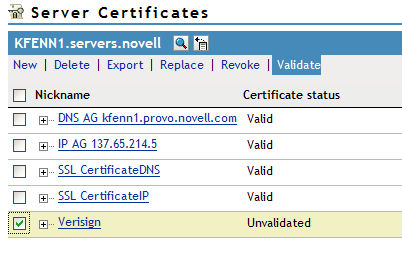
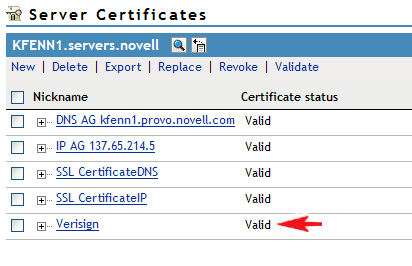
23. You will need to select the "Server Certificates" task again to refresh your certificates list. You should see a "+" sign next to your certificate indicating that it has been recreated. Select the checkmark next to the certificate and then select the "Validate" link.
24. If you see the certificate status turn to "Valid" then you have successfully completed the certificate update.
25. Assuming that the name of the SSL certificate object
has not changed throughout this process, in order for your web
applications to read the new certificate, you'll need to restart
those web applications so that the updated certificate is put into
memory. Once you have verified that everything is working
correctly, don't forget to make a new backup of the certificate as
described in Step 1-4 to keep on hand for disaster recovery
purposes.
Additional Information
Formerly known as TID# 10090786
Note, if at any time the "Certificate status" begins to show "Import" rather than "Unvalidated" when selecting any server to view its certificates, you may have to restart tomcat on the server that is running iManager to resolve that faulty status.